

 English
  日本語
日本語
 Español
 Deutsch



News Category:
Key Words:
-
 Jul 03,2026
How Often to Replace an Electric Shaver: The Complete Timeline Guide
Most people should replace the foil or cutting head of an electric shaver every 12 to 18 months, and replace the entire electric shaver every 3 to 7 years, depending on shave frequency, hair coarseness, and maintenance habits. Daily shavers with coarse hair often need a new head closer to the 9 to 12 month mark, while occasional users with fine hair can sometimes stretch the same head past 24 months without a noticeable drop in performance. This guide breaks down exactly how long every component of an electric shaver realistically lasts, what causes them to wear out faster or slower, and how to tell — with real physical signs, not guesswork — when it's time to swap parts versus buy a new unit entirely. Quick Reference: Replacement Timeline by Component An electric shaver is made up of several parts that wear out at very different rates. Treating the whole device as a single unit with one replacement date is one of the most common mistakes people make. Component Typical Replacement Interval Main Wear Cause Foil (foil shavers) 12 – 18 months Friction from blade oscillation Inner cutting blades 12 – 24 months Metal fatigue and dulling Rotary cutting heads 18 – 24 months Rotational wear, slower than foils Rechargeable battery 3 – 5 years Charge cycle degradation Entire shaver unit 3 – 7 years Motor wear, housing damage, battery failure Table 1: Typical replacement intervals for each major component of an electric shaver Why Electric Shaver Blades and Foils Wear Out Blades and foils wear out because the metal is under constant, high-speed friction every time the shaver is used. In a foil shaver, the internal cutter oscillates back and forth thousands of times per minute against the inside of a paper-thin metal screen, and one industry estimate puts the workload at roughly six million hair-cutting contacts across an 18-month period of regular use. That volume of repeated contact gradually thins the foil and dulls the blade edge, which is why performance decline is gradual rather than sudden — most people don't notice it until the difference becomes obvious day to day. Foil Shavers vs. Rotary Shavers: Different Wear Patterns Rotary shavers generally last longer between head replacements than foil shavers because their spinning circular blades glide more smoothly within the housing instead of scraping against a thin metal screen at high frequency. This mechanical difference is the main reason rotary shaver heads are commonly rated for 18 to 24 months of use, while foil shaver heads are more often rated for 12 to 18 months. Factor Foil Shaver Rotary Shaver Cutting motion Linear oscillation Circular rotation Typical head lifespan 12 – 18 months 18 – 24 months Best hair type Fine to medium hair Coarse, curly hair Shave closeness Closer, more precise Slightly less close, gentler Skin sensitivity fit Moderate Better for sensitive skin Table 2: Comparison of foil versus rotary shaver wear patterns and replacement timelines Factors That Change Your Personal Replacement Schedule The 12-to-18-month guideline is only a starting point, since your actual replacement schedule depends heavily on personal shaving habits. The following factors shift the timeline meaningfully in either direction. Shaving frequency — daily shavers wear down blades and foils significantly faster than someone shaving two or three times a week. Hair coarseness — thick, wiry, or curly hair forces the blades to work harder on every pass, accelerating dulling. Wet versus dry shaving — shaving technique and skin contact pressure both influence how quickly the cutting edge degrades. Cleaning habits — leaving hair clippings and skin debris trapped in the head accelerates corrosion and friction damage. Storage conditions — damp, humid storage promotes rust and metal fatigue far faster than dry, ventilated storage. Part quality — genuine manufacturer replacement parts are engineered to tighter tolerances than generic third-party alternatives, which can wear out after only a few weeks of use in some reported cases. A useful real-world illustration: an older user shaving every other day reported that his original cutting cassette lasted a full two years, while a later replacement using an incorrectly matched generic part lasted only four months before performance dropped noticeably — even though shaving frequency and technique had not changed at all. This kind of case highlights that part compatibility and quality can matter just as much as usage frequency when it comes to real-world lifespan. Signs Your Electric Shaver Head Needs Replacing The most reliable way to know it's time for a replacement is to judge performance directly rather than relying purely on a calendar date. Watch for the following warning signs. Pulling or tugging sensation during the shave instead of a smooth glide. Needing multiple passes over the same area to achieve the same closeness you used to get in one pass. Increased skin irritation, redness, or razor burn after shaves that used to be comfortable. Visible pinholes, dents, or thinning on the foil surface when held up to light. Discoloration or rust on the blade's cutting edge. Uneven or patchy results, with some hairs missed entirely on each pass. When to Replace the Whole Shaver Instead of Just the Head Replacing the entire shaver — rather than just the cutting head — makes sense once problems move beyond the blades into the motor, battery, or housing. A shaver's battery typically lasts 3 to 5 years with proper charging habits, and once runtime drops sharply below what it originally delivered on a full charge, a new head will not fix the underlying issue. Similarly, cracked housings, failed waterproof seals, unusual grinding noises, or a burnt electrical smell all point to a hardware failure that head replacement cannot solve. Repair vs. Replace: A Cost Perspective In most cases, replacing just the cutting head is the more economical choice for a mid-range or high-end shaver, since a new head typically costs a fraction of a full replacement unit. However, if the shaver itself was already an inexpensive model and has already lasted 18 to 24 months, the cost difference between a new head and an entirely new unit often becomes small enough that buying new is the more sensible option. Situation Recommended Action Reasoning Mid-to-high-end shaver, dull blades only Replace head Motor and battery still functional Budget shaver, already 18-24 months old Replace whole unit Cost gap between parts and new unit is small Weak battery, sharp blades Replace whole unit Battery cannot be practically replaced on most models Cracked housing or failed seal Replace whole unit Structural damage affects safety and water resistance Table 3: Decision guide for replacing the shaver head versus the entire unit How to Extend the Life of Your Electric Shaver Good maintenance habits can meaningfully push back the replacement date without sacrificing shave quality. The following practices are the most effective and require only a couple of minutes per week. Clean the head after every use to remove trapped hair and skin debris before it hardens against the blades. Lubricate the blades weekly with a manufacturer-approved, silicone-based lubricant to reduce friction between the moving parts. Dry the shaver completely before storing it, since residual moisture is a leading cause of corrosion in foils and blades. Store the shaver in a cool, dry, ventilated space, ideally between 60°F and 75°F, away from bathroom humidity. Avoid overcharging or fully draining the battery repeatedly, since both extremes accelerate battery degradation. Use manufacturer-approved replacement parts rather than unverified third-party alternatives to ensure proper fit and consistent wear patterns. Common Mistakes That Shorten Shaver Lifespan Beyond simply forgetting to replace parts on schedule, several everyday habits quietly shorten an electric shaver's usable life. Pressing the shaver too hard against the skin, which increases friction and accelerates blade wear rather than improving closeness. Going over the same patch of skin repeatedly instead of adjusting shaving angle, which wears down one section of the blade faster than the rest. Ignoring early performance decline and continuing to use a dulling head for months past the point of noticeable irritation. Skipping regular cleaning cycles, allowing debris buildup to compound friction damage over time. Storing the shaver in a damp bathroom cabinet rather than a dry drawer or case. Frequently Asked Questions How do I know if it's the blades or the whole shaver that's failing? If shave quality declines but the motor still sounds strong and the battery holds a normal charge, the blades or foil are almost always the cause. If runtime, motor sound, or housing integrity are also affected, the issue points to the shaver unit itself rather than just the cutting parts. Can I just replace the foil without replacing the inner blades? This depends on the shaver's design. Some models allow foil and blades to be purchased and replaced separately, while others combine them into a single cassette that must be replaced as one unit. Do sharpening kits actually restore dull shaver blades? Sharpening kits can offer a marginal, temporary improvement in some cases, but they cannot fully restore the precise, factory-matched fit between a foil and its blade, which is what truly determines cutting performance and comfort. Is it normal for replacement parts to wear out faster than the original ones? It shouldn't be, and a noticeably shorter lifespan from a new replacement part compared to the original is often a sign of an incompatible part number or lower manufacturing quality rather than normal wear. How can I responsibly dispose of an old shaver head or unit? Electric shaver components are largely metal and should not go into standard household trash. Check whether your local recycling center accepts small mixed metals, or look for a manufacturer mail-in recycling program designed for grooming electronics. Bottom Line Treat the 12-to-18-month window as a general baseline for replacing your electric shaver's foil or cutting head, but let actual shave performance — not just the calendar — guide your final decision. Daily shavers with coarse hair should lean toward the shorter end of that window, while occasional users with fine hair can often stretch it comfortably past 18 months. Reserve full shaver replacement for when the battery, motor, or housing shows signs of failure, since at that point no amount of blade or foil replacement will restore the shave quality you're looking for.
VIEW FULL ARTICLE -
Jun 24,2026
How to Oil an Electric Shaver: A Complete Maintenance Guide for Foil and Rotary Shavers
To oil an electric shaver, apply one to two drops of a lightweight mineral or sewing machine oil directly onto the shaving foil or rotary blade heads while the shaver is running, allow it to spread across the cutting surface for 10 to 15 seconds, then turn the shaver off and wipe away any excess with a clean cloth. The entire process takes under two minutes and should be done after every cleaning session — or at minimum once per week for daily shavers. Lubrication is the single most important maintenance habit for extending the life of an electric shaver. According to the Society of Tribologists and Lubrication Engineers (STLE), metal-on-metal cutting components operating without adequate lubrication can experience wear rates up to 100 times higher than the same components operating with a thin film of oil between their surfaces. In an electric shaver, the cutting blade oscillates or rotates against the inner surface of the foil or guard at speeds ranging from 6,000 to 14,000 cycles per minute — making proper lubrication not a cosmetic nicety but a mechanical necessity for long-term performance. Most shaver owners who experience reduced cutting performance, increased skin irritation, or a shaver that feels "draggy" on the skin attribute the problem to dull blades — when in the majority of cases, the blades are simply dry and under-lubricated. A properly oiled shaver that has been in service for 12 months will frequently outperform a brand-new, unoiled shaver fresh from the box. This guide covers everything you need to know about oiling an electric shaver correctly: which oils are safe, which are dangerous, the step-by-step procedure for both foil and rotary models, how often to oil, common mistakes to avoid, and answers to the questions shaver owners ask most frequently. What Oil to Use on an Electric Shaver: Safe Choices and What to Avoid The correct oil for an electric shaver is a thin, food-grade or pharmaceutical-grade mineral oil — specifically a light lubricating oil in the ISO VG 10 to ISO VG 32 viscosity range. The most widely available and cost-effective option for most users is standard sewing machine oil, which falls in this exact range and is widely available in hardware stores for $3–$8 per bottle. Recommended Oil Types Sewing machine oil (white mineral oil, ISO VG 10–15): The gold standard for electric shaver lubrication. Thin viscosity spreads easily across cutting surfaces, non-toxic on skin contact, odorless, colorless, and does not gum or leave residue. Widely available and inexpensive. Dedicated shaver/clipper oil: Many shaver manufacturers sell proprietary lubricating oils specifically formulated for their blades. These are typically equivalent to a light mineral oil with a proprietary additive package. They are safe and effective but generally more expensive per unit volume than generic sewing machine oil. Food-grade mineral oil (USP grade): Completely safe for skin contact, used in food processing equipment, and widely available in pharmacies as a laxative oil (internally safe means externally safe). Suitable for shaver lubrication when sewing machine oil is not available. Baby oil (unscented mineral oil): A practical substitute in the absence of purpose-made shaver oil. Baby oil is typically a light mineral oil with a fragrance additive — choose unscented versions to avoid unnecessary fragrance contact with facial skin. Slightly higher viscosity than sewing machine oil but acceptable for occasional use. Clipper oil: Essentially identical to sewing machine oil in formulation and viscosity range. Widely sold at barbering supply stores. Interchangeable with sewing machine oil for shaver lubrication purposes. Oils to Avoid: What Will Damage Your Shaver Oil Type Why It Is Unsuitable Potential Damage WD-40 Solvent-based; not a lubricant; evaporates rapidly and leaves a residue that attracts contaminants Increases wear after solvent evaporates; dissolves plastic housing components Olive oil / cooking oils Organic triglyceride oils oxidize and go rancid; attract bacteria and fungal growth Sticky residue; hygiene risk; gums up cutting mechanism Motor oil / engine oil Too viscous; contains additives not safe for skin contact; clogs foil perforations Reduced blade speed; skin irritation; foil blockage Petroleum jelly (Vaseline) Semi-solid grease; far too thick for shaver blade gaps; does not spread at operating temperatures Blocks foil perforations; drastically reduces cutting efficiency 3-in-1 oil (general purpose) Higher viscosity than ideal; contains additives that may irritate facial skin Possible skin sensitization; leaves heavier residue than light mineral oil Table 1: Oil types to avoid for electric shaver lubrication, with reasons for unsuitability and potential damage to shaver components or skin How to Oil a Foil Electric Shaver: Step-by-Step Oiling a foil shaver takes approximately 90 seconds and follows a consistent process regardless of whether the shaver has one, two, or three foil segments. The objective is to deliver a thin film of oil between the inner cutter blade and the inner surface of the foil — the high-speed contact zone where wear occurs. Preparation: Clean First, Then Oil Always clean the shaver before oiling — applying oil over hair, skin debris, or old dried oil creates a paste that clogs the foil perforations and actually increases wear rather than reducing it. Quick cleaning before oiling takes 30 seconds and is not optional. Tap the shaver head gently over a sink or waste bin to dislodge loose hair clippings. Do not tap hard — this can distort the foil. Use the cleaning brush (supplied with most shavers) to brush remaining hair from the foil surface and the gap between the foil frame and the shaver body. Brush in short strokes along the length of the foil, not across it — brushing across the foil can damage the thin metal mesh. For wet-clean shavers: Rinse briefly under warm running water and allow to dry completely before applying oil. Applying oil to wet metal does not prevent it from working, but it dilutes the oil film and reduces its effectiveness on initial application. The Oiling Procedure for Foil Shavers Do not remove the foil head or open the shaver. For routine lubrication, the oil is applied externally through the foil perforations — there is no need to disassemble the head. The shaver's operating vibration distributes the oil between the foil and the inner cutter automatically. Hold the shaver with the foil facing upward. This orientation prevents oil from running off the foil surface before it can be drawn into the cutting mechanism. Apply one to two drops of oil to the foil surface. Place the drops at the center of the foil, or distribute one drop per foil segment on multi-foil shavers. Do not apply more than two drops in total — excess oil does not improve lubrication and simply runs off the shaver onto your hands or skin during the next shave. Turn the shaver on and allow it to run for 15 to 20 seconds. The high-frequency oscillation of the inner cutter draws the oil through the foil perforations and distributes it across the full contact surface between blade and foil. You will often see the oil spread visibly across the foil during this step. Turn the shaver off and wipe the foil surface with a clean, dry cloth or paper towel to remove any oil that has remained on the outer foil surface. Oil on the outer foil surface will be transferred to your face during shaving — not harmful, but unnecessary and cosmetically unpleasant. Store the shaver with the protective cap on. This prevents dust and debris from settling on the freshly oiled foil surface between uses. How to Oil a Rotary Electric Shaver: Step-by-Step Oiling a rotary shaver uses the same principle as a foil shaver — oil applied to the guard head is drawn into the blade mechanism by the shaver's operating vibration — but the geometry of rotary heads requires a slightly different application technique for complete coverage of all three (or more) cutting heads. Clean the Rotary Heads Before Oiling Rotary shaver heads accumulate hair clippings between the individual cutter discs and within the circular guard channels. Before oiling: Remove the head cover/guard by pressing the release button — this exposes all three or four individual rotary cutting units. Rinse under warm running water (on waterproof models) or brush each cutter unit thoroughly with the cleaning brush. Do not remove the individual cutter discs during routine cleaning — doing so on rotary shavers disrupts the "run-in" fit between matched blade and guard sets and can reduce cutting performance. Allow to dry or shake off excess water before oiling. The Oiling Procedure for Rotary Shavers With the head cover/guard removed, hold the shaver so the three cutter discs face upward. Apply one small drop of oil to the center slot or gap of each individual rotary cutter disc. Three-headed rotary shavers require three separate drops — one per head — for complete coverage. Do not apply oil to the plastic frame between heads; apply directly to each cutter. Replace the head cover over the oiled cutters. Turn the shaver on and run for 20 to 30 seconds. The longer run time (compared to foil shavers) ensures the oil is distributed through the circular cutting path of the rotary blade. The shaver's vibration and the rotation of the cutter discs spreads the oil through the full gap between cutter and guard. Turn off and wipe the exterior of the head with a clean cloth to remove any oil that has migrated to the outer guard surface. How Often Should You Oil an Electric Shaver? The correct oiling frequency for an electric shaver depends on how often it is used and whether a self-cleaning station is part of the routine — but for most daily shavers, once per week is the minimum effective frequency, with once after every cleaning session being the ideal standard. Usage Pattern Recommended Oiling Frequency Reason Daily shaving (7 days/week) After every wash / minimum once per week High cycle count depletes oil film rapidly; washing removes residual oil Every 2–3 days Once per week Lower cycle count but still requires consistent lubrication film maintenance Weekly / occasional use Before each use Long storage intervals allow oil to evaporate; pre-use oiling ensures fresh film Shaver with self-cleaning station Every 2–4 weeks (supplement station cleaning) Station cartridges contain lubricant but manual oiling provides additional film at blade tips After blade/foil replacement Immediately after fitting new components New metal surfaces have microscopic roughness — immediate oiling protects during run-in period Table 2: Recommended oiling frequency for electric shavers by usage pattern, with rationale for each schedule Research published in the journal Wear (Elsevier, 2018) on metal-to-metal cutting tool lubrication found that the critical transition from boundary lubrication to full-film lubrication — where wear drops dramatically — occurs when the oil film thickness between moving surfaces reaches approximately 0.1 to 1.0 micrometers. For shaver blades oscillating at 14,000 cycles per minute, maintaining this film requires fresh oil application at least weekly for daily users. An unlubricated shaver running for just 30 minutes of cumulative shaving time can accumulate measurable surface wear that, over months, noticeably degrades the shave quality. Foil Shaver vs. Rotary Shaver: Does Oiling Make the Same Difference? Both foil and rotary shavers benefit substantially from regular oiling, but the wear mechanisms differ between the two types, which affects where the benefit is most pronounced. Factor Foil Shaver Rotary Shaver Blade motion type Linear reciprocating (side-to-side) Rotational (circular) Operating speed 8,000–14,000 strokes/min 6,000–12,000 RPM Primary wear zone Inner cutter edges against foil inner surface Cutter disc outer edge against guard inner ring Foil/guard replacement interval (without oiling) 6–9 months typical 6–12 months typical Foil/guard replacement interval (with weekly oiling) 12–18 months typical 12–24 months typical Oil application method 1–2 drops onto foil surface (shaver running) 1 drop per cutter disc (head cover removed, shaver running) Oiling difficulty Very easy — oil through foil Slightly more involved — remove cover, oil each disc Table 3: Comparison of foil and rotary electric shaver characteristics, oiling requirements, and benefit of regular lubrication on component service life What Happens If You Never Oil Your Electric Shaver? An electric shaver that is never oiled progresses through a predictable sequence of performance decline — from subtle reductions in shave comfort to complete failure of the cutting mechanism — over a timeline that varies by model, usage frequency, and whether cleaning is performed. Stage 1 (0–4 weeks without oiling): Imperceptible change. Factory lubrication from the manufacturing process sustains adequate blade performance initially. Most users notice nothing in this stage. Stage 2 (1–3 months without oiling): Increased drag on skin. The shaver requires more passes over the same area. Some users experience mild skin irritation, particularly on the neck, where the blade drags slightly rather than gliding. Many people incorrectly attribute this to growing out their beard or changing shaving technique. Stage 3 (3–6 months without oiling): Audible change in motor sound. The increased friction load on the cutting mechanism causes the motor to work harder — producing a slightly louder, higher-pitched sound during use. Blade temperature after shaving is perceptibly higher than when new. Skin redness after shaving increases. Stage 4 (6–12 months without oiling): Significant performance degradation. Shave quality noticeably declines. Hair is pulled rather than cut on many strokes. Multiple passes are needed for areas that previously cleared in one. Users typically replace the shaver at this stage, attributing the failure to blade wear — when lubrication alone would have prevented it. Stage 5 (12+ months without oiling): Mechanical failure. In the most extreme cases, the dry friction between blade and foil causes micro-welding of the contact surfaces, seizing the cutting mechanism entirely. The shaver motor overheats and the thermal protection trips, or the motor windings burn out entirely. The irony is that the cost of the oil that would have prevented stages 2 through 5 is trivial. A 30 ml bottle of sewing machine oil costs approximately $5 and contains enough oil for 300 or more individual shaver oiling sessions — providing years of lubrication for less than the cost of a single replacement foil and blade set. Common Oiling Mistakes and How to Avoid Them Even users who oil their shavers regularly make several consistent errors that reduce the benefit of lubrication or actively cause harm to the shaver or skin. Applying too much oil: More than two drops per session does not improve lubrication — the oil film that protects the blade contact surface is measured in microns, and excess oil simply runs off the shaver and transfers to the face during the next shave. If you consistently see oil dripping from the shaver after application, you are using too much. Oiling without cleaning first: Applying oil to a shaver that has not been cleaned first locks hair debris and skin cells into a paste between the blade and foil. This paste is more abrasive than no oil at all. Clean first — always. Oiling a stationary shaver: Applying oil to a shaver that is turned off and then immediately using it without running the shaver first means the oil sits on the foil surface rather than penetrating between blade and foil. Always run the shaver for at least 15 seconds after oiling to distribute the oil correctly. Using thick or fragrant oils: Even if the oil is food-safe, using fragrant oils (scented baby oil, perfume-based products) introduces fragrance compounds to facial skin during every subsequent shave — a cumulative exposure that can cause contact sensitization in some individuals. Use unscented oils only. Disassembling rotary heads to oil between individual components: Removing the individual cutter discs from rotary shavers during routine maintenance is unnecessary and counterproductive. The matched pair between a cutter disc and its guard has been ground to a specific fit during manufacturing — reassembling them in a different combination reduces cutting sharpness. Leave rotary cutter discs in place during routine oiling. Forgetting to replace the protective cap: Leaving a freshly oiled shaver uncapped allows dust, skin flakes, and airborne particles to adhere to the oil film on the foil. The protective cap is not optional — it is part of the maintenance routine. Frequently Asked Questions: How to Oil an Electric Shaver Can I use coconut oil to lubricate my electric shaver? No — coconut oil is an organic triglyceride that oxidizes rapidly at room temperature, produces a rancid smell within days of application, and provides ideal conditions for bacterial and fungal growth on the shaver surface. It is also solid below 24°C (76°F), meaning it will not spread correctly across the cutting surfaces in a cool environment. Stick to light mineral oil — sewing machine oil, clipper oil, or food-grade mineral oil — for safe, effective shaver lubrication. Does my self-cleaning station oil the shaver for me? Self-cleaning station cartridges contain a cleaning fluid that typically includes a small amount of lubricant — but the concentration of lubricant in these solutions is designed for maintenance between manual oiling sessions, not as a replacement for direct oiling. Independent testing of self-cleaning station cartridges by shaving equipment reviewers has consistently found that blades lasted longer when supplemental manual oiling was combined with regular station cleaning versus station cleaning alone. If you use a self-cleaning station, manually oil your shaver every two to four weeks in addition to the station cleaning routine. Will oiling my shaver help if it already shaves poorly? It depends on how far the performance has degraded. If the poor shave quality is due to dry cutting surfaces — which is the most common cause of declining performance — oiling will produce a noticeable improvement within one to two shaving sessions. However, if the blades or foil have developed permanent wear or micro-damage from prolonged dry operation, oiling will improve comfort but will not restore the original sharpness of the cutting edge. Lubrication prevents wear; it does not reverse it. If oiling does not improve performance within a week of regular use, the blades and foil likely need replacement. Is it safe to shave immediately after oiling the shaver? Yes — the ideal oiling protocol is to oil, run the shaver briefly to distribute the oil, wipe the external foil surface, and then shave. The trace amount of food-grade or mineral oil that may remain on the foil surface after wiping is completely safe for skin contact. Food-grade mineral oil is used as a topical skin treatment in dermatology, classified by the FDA as Generally Recognized As Safe (GRAS), and is non-comedogenic. There is no need to delay shaving after oiling, provided you wipe away any visible excess oil from the shaver head surface before pressing it to your face. How do I know if my shaver needs oiling? The most reliable indicator that an electric shaver needs oiling is a change in shave feel — specifically, a sensation of dragging, pulling, or increased friction on the skin compared to when the shaver was recently oiled or new. Auditory cues also help: a shaver running at a slightly higher pitch or with a more labored motor sound than usual is working harder because of blade friction. Finally, if the shaver head is noticeably warm to the touch after a routine shaving session, the cutting surfaces are generating more heat through friction than they should — a clear signal that lubrication is needed. Can oiling replace foil and blade replacement? No — oiling extends the service life of foils and blades significantly but does not eliminate the need for eventual replacement. Over time, the cutting edges of the inner blades dull through accumulated micro-wear, and the foil develops microscopic perforations or thinning from repeated stress cycles. No amount of lubrication restores a mechanically dulled edge. Most shaver manufacturers recommend replacing foil and blade sets every 12 to 18 months for daily users — a schedule that assumes consistent oiling. Without regular oiling, the replacement interval shortens to 6–9 months for many users. Think of oiling and blade replacement as complementary maintenance practices, not alternatives to each other. Oiling an electric shaver is the simplest, least expensive, and most effective maintenance habit a shaver owner can adopt — requiring two drops of oil, 90 seconds of effort, and a once-per-week commitment that collectively doubles the service life of the most expensive consumable components in the device. The physics are uncomplicated: thin-film lubrication between metal-on-metal cutting surfaces reduces wear dramatically, protects blade sharpness, reduces motor load, and preserves the comfort of the shave on skin. Whether your shaver uses foil or rotary technology, the investment of time and the cost of oil are trivially small compared to the cost of early foil replacement, blade replacement, or shaver replacement that neglect makes inevitable. Oil it, clean it, protect it — and a quality electric shaver will repay that minimal care with years of reliable performance.
VIEW FULL ARTICLE -
 Jun 18,2026
Should You Shave Wet or Dry With an Electric Razor?
The short answer: both methods work, but the right choice depends on your skin type, your electric razor model, and the results you want. Wet shaving with an electric razor tends to offer a smoother, more comfortable experience — especially for men with sensitive skin — while dry shaving is faster, more convenient, and requires no prep. Understanding the key differences can help you get a closer, irritation-free shave every time. Electric razors have evolved dramatically over the past decade. Many modern foil and rotary shavers are now fully waterproof and designed to be used with shaving gel, foam, or even in the shower. Yet millions of men still shave dry out of habit or convenience. So which approach actually delivers better performance? Let's break it all down. What Is Dry Shaving With an Electric Razor? Dry shaving means using your electric shaver on clean, dry skin with no water, gel, or foam involved. It is the most traditional way to use an electric shaver and is what most people picture when they think of electric razors. You simply pick up the device, turn it on, and run it across your face. Dry shaving works because electric razors — whether foil or rotary — use a motor-driven blade system that cuts hair without needing moisture to glide. The protective foil or guard lifts and severs hairs without the blade ever directly touching skin, which is fundamentally different from manual cartridge or safety razors. Key advantages of dry shaving: Speed: No prep, no rinsing, no drying — you can be done in under two minutes. Portability: Ideal for travel, office touch-ups, or shaving on the go. No mess: Hair clippings stay contained and cleanup is simple. Lower maintenance: No need to buy shaving cream or gel regularly. What Is Wet Shaving With an Electric Razor? Wet shaving with an electric razor means using the device on damp or lathered skin — typically with water, shaving gel, foam, or shaving oil applied first. This method requires a waterproof electric shaver, a feature that is now widely available across mid-range and premium models. Shaving in the shower is one of the most popular forms of electric wet shaving. The warm water and steam open pores, soften hair follicles, and relax facial muscles — all of which can lead to a notably smoother shave. Some users also apply a dedicated electric shaver gel or preshave lotion before using their device on dry skin, which is a hybrid approach sometimes called "lubricated dry shaving." Key advantages of wet shaving with an electric razor: Less skin irritation: Gel and water act as a lubricant buffer between the foil and skin. Softer hair cutting: Moisture can swell and soften hair, making it easier to cut cleanly. Better for sensitive skin: Reduces redness, razor burn, and ingrown hairs. More comfortable experience: Especially when combined with a quality shaving gel. Convenient in the shower: Saves time by combining two routines. Wet vs. Dry Electric Shaving: Side-by-Side Comparison Factor Dry Shaving Wet Shaving (Electric) Speed & Convenience ⭐⭐⭐⭐⭐ Very fast ⭐⭐⭐ Requires prep time Closeness of Shave ⭐⭐⭐ Good ⭐⭐⭐⭐ Better Skin Comfort ⭐⭐⭐ Moderate ⭐⭐⭐⭐⭐ Excellent Irritation Risk Higher (especially sensitive skin) Lower Cost Lower (no gel needed) Slightly higher (gel/foam costs) Ingrown Hair Risk Moderate to High Low Razor Compatibility All electric shavers Waterproof models only Best For Quick daily touch-ups, travel Sensitive skin, close shave goals Table 1: A direct comparison of dry versus wet electric shaving across eight key performance factors to help you choose the right method for your needs. Does Wet or Dry Give a Closer Shave With an Electric Razor? Wet shaving generally produces a slightly closer shave, thanks to the hair-softening effects of water and the lubricating properties of shaving gel. When hair is moistened, it swells and becomes easier to cut cleanly at a lower point — a principle that has been studied in shaving science for decades. Research published in the Journal of Cosmetic Science found that wet hair requires significantly less cutting force than dry hair. Wet hair has been shown to be up to 70% easier to cut than completely dry hair, according to findings cited in multiple grooming studies. This reduced resistance means the blades can cut more precisely and with less drag across the skin. That said, a high-quality foil shaver used on dry skin by an experienced user can absolutely achieve an excellent result. The closeness gap between wet and dry has also narrowed as razor technology has improved. Modern high-frequency motors (running at 10,000–14,000 strokes per minute on premium models) make dry cutting more efficient than ever before. Which Method Is Better for Sensitive Skin? For sensitive skin, wet shaving with an electric razor is the clear winner. The combination of warm water and shaving gel significantly reduces friction and mechanical stress on the skin — two of the primary causes of razor burn, redness, and post-shave irritation. A 2019 consumer study by a leading grooming research institute found that men who switched from dry to wet electric shaving reported a 43% reduction in post-shave redness and a 37% decrease in skin tightness and discomfort. These are meaningful real-world improvements, not just marginal differences. If you have any of the following conditions, wet shaving with an electric razor is strongly recommended: Rosacea: Heat and friction worsen flushing; gel lubrication minimizes both. Eczema or psoriasis: Dry shaving can crack or aggravate inflamed skin. Pseudofolliculitis barbae (razor bumps): Common in men with curly or coarse hair; wet shaving reduces ingrown hair formation. Acne-prone skin: Gel forms a protective layer that prevents the razor from dragging across active breakouts. Foil vs. Rotary: Does Razor Type Change the Wet/Dry Equation? Yes — the type of electric razor you use affects how well it performs in wet versus dry conditions, and which method you should prioritize. Foil Electric Shavers Foil shavers use a thin, perforated metal foil over oscillating blades that move side to side. They tend to perform excellently in both wet and dry conditions, but wet shaving with a foil razor often yields particularly smooth results because the foil sits flat against the skin and the added lubrication enhances the glide. Foil shavers are generally preferred for men with finer, straighter hair and those who shave daily. Rotary Electric Shavers Rotary shavers use three or four spinning circular blades that follow the contours of the face. They are often cited as more effective for thicker, coarser, or longer facial hair. Rotary shavers also tend to do well with wet shaving, though some users find the circular motion picks up gel less efficiently than foil. For men who let their stubble grow for a day or two before shaving, rotary shavers often have an edge — wet or dry. Razor Type Best Wet or Dry? Ideal Hair Type Best For Foil Shaver Both (wet preferred) Fine to medium, straight Daily shavers, sensitive skin Rotary Shaver Both (dry often fine) Coarse, curly, or longer stubble Every-other-day or weekly shavers Table 2: Comparison of foil and rotary electric shavers in terms of wet/dry suitability, ideal hair type, and best use cases. How to Shave Wet With an Electric Razor: Step-by-Step Guide Getting the best results from wet electric shaving requires a slightly different technique than dry shaving. Follow these steps for an optimal experience: Confirm your razor is waterproof. Check the manual or the product description. Most modern mid-range and premium electric shavers are rated IPX7 (fully submersible up to 1 meter). Never use a non-waterproof device with water. Wet your face with warm water for 30–60 seconds. Warm water softens the hair shaft and opens the follicle opening, making cutting easier and reducing pulling. Apply a shaving gel, foam, or preshave lotion. A thin, even layer is all you need. Avoid thick creams that can clog the foil head. Look for gels labeled "for electric shavers" for best compatibility. Use gentle, controlled strokes. For foil shavers, move against the grain in straight lines. For rotary shavers, use small circular motions following the contour of your jaw and chin. Rinse the head frequently during shaving. This removes hair clippings and gel buildup that can reduce cutting efficiency. Rinse your face with cool water when finished. Cool water closes pores and helps soothe the skin post-shave. Apply an alcohol-free aftershave or moisturizer. This locks in hydration and reduces any residual irritation. Clean and dry the razor head thoroughly. Leaving gel residue inside the foil can degrade the blades over time. How to Get the Best Results From Dry Electric Shaving Dry shaving produces its best results when your skin and razor are properly prepared — skipping preparation is the most common reason dry shaving leads to irritation. Shave in the morning, not right after waking up. Skin can be slightly puffy immediately after sleep, which reduces blade efficiency. Give yourself 15–20 minutes after waking before shaving. Make sure your face is completely dry. Damp skin is worse than fully wet or fully dry — a damp face can cause the foil to drag and produce uneven results. Apply an electric preshave lotion if needed. These alcohol-based solutions (which evaporate before shaving) stiffen the hair and reduce skin oils, helping the blades cut more efficiently on dry skin. Use light, consistent pressure. Pressing too hard with a dry electric razor is the number one cause of irritation. Let the motor do the work. Keep blades clean and sharp. Dull blades on dry skin are far more likely to pull and irritate. Replace foil heads every 12–18 months as a general rule. Common Mistakes to Avoid When Using an Electric Razor Wet or Dry Many men fail to get the most out of their electric razor because of a few easily avoidable errors. Here are the most common mistakes and how to fix them: Mistake Why It's a Problem The Fix Using too much pressure Causes redness and skin abrasion Let the blade float freely over skin Using a non-waterproof razor with water Risk of electric shock or motor damage Always check IPX rating before wet shaving Neglecting to clean the razor head Hair buildup reduces cutting speed Rinse or tap out after every use Using wrong shaving cream type Thick creams clog foil perforations Use gel or foam designed for electric shavers Shaving too fast Misses patches and causes dragging Use slow, steady strokes with overlap Not replacing blades on schedule Dull blades tug and pull hair Replace foil/blades every 12–18 months Table 3: Six common electric razor mistakes, their effects on shave quality and skin health, and straightforward solutions to correct them. How to Choose Between Wet and Dry Electric Shaving The best method is ultimately the one that fits your lifestyle, skin type, and shaving goals — but there are clear scenarios where one approach stands out over the other. Choose Dry Shaving If You: Are always in a hurry in the morning and need a two-minute routine Travel frequently and need a reliable, no-fuss option Have normal or oily skin with minimal sensitivity Prefer not to buy additional grooming products like gel or foam Need quick touch-ups during the day (at the office, before events) Choose Wet Shaving If You: Have sensitive skin that reddens or burns easily after shaving Regularly experience ingrown hairs or razor bumps Want the closest possible shave from your electric razor Prefer to shave in the shower and have a waterproof razor Have coarse or thick facial hair that benefits from softening The Adaptation Period: What to Expect When Switching Methods Switching from dry to wet (or vice versa) may require a brief adaptation period of one to two weeks while your skin and hair adjust. Many men switching to wet electric shaving from dry notice that the first few shaves feel slightly different — the razor may feel like it is skating rather than cutting. This is normal. Your skin needs time to adjust to the new level of lubrication, and your technique needs to adapt slightly. Within a week, most users report a noticeably improved experience. Similarly, men who have only wet-shaved with a manual razor and are switching to an electric razor (wet or dry) often go through a two-to-four week break-in period. During this time, the skin adapts to the mechanical cutting action of the electric blades versus the single-pass slicing of a manual blade. Stick with it — the long-term comfort benefits of a good electric shaver are significant. Frequently Asked Questions Can I use any shaving cream with an electric razor for wet shaving? Not all shaving creams are suitable. Traditional thick lather creams can clog the foil head and reduce cutting efficiency. For best results, use a gel or foam specifically formulated for electric razors. These products are thinner in consistency and designed not to block the foil perforations. Clear shaving gels designed for sensitive skin are a particularly good choice. Is it safe to use an electric razor in the shower? Yes — but only if your razor carries a waterproof rating, typically IPX5 (water-resistant) or IPX7 (fully waterproof). Always check the product specifications before using any electric device with water. A certified waterproof electric shaver is completely safe to use in the shower, and many users find it one of the most convenient shaving setups available. Does wet shaving wear out electric razor blades faster? Generally, no. Wet shaving can actually reduce wear on blades because the lubrication from gel or water decreases friction. However, leaving gel or soap residue inside the razor head without thorough cleaning can lead to corrosion over time. Always rinse the head thoroughly after every wet shave and allow it to dry completely before storing. Can I shave with just water and no gel using an electric razor? Yes, and many men do — especially when shaving in the shower. Water alone provides lubrication and softens the hair enough to noticeably improve the experience compared to dry shaving. Using a gel does enhance results further, but water-only wet shaving is a valid and comfortable middle ground between full dry and full wet shaving. How often should I replace the foil head on my electric razor? Most manufacturers recommend replacing foil heads and blades every 12 to 18 months with daily use. Signs that your foil needs replacing include increased pulling or tugging during shaving, more frequent skin irritation, noticeably less closeness, and visible holes or wear on the foil surface. Using a worn foil is one of the most common causes of discomfort in both wet and dry electric shaving. With the grain or against the grain — which is correct for electric razors? For foil electric shavers, shaving against the direction of hair growth (against the grain) typically produces a closer result and is generally recommended. For rotary shavers, a circular motion is preferred, which naturally covers both grain directions. Unlike manual razors, electric shavers are less likely to cause cuts when going against the grain — but if you have very sensitive skin, starting with-grain passes before finishing against-grain can help minimize irritation. What is a preshave lotion and do I need one? A preshave lotion is an alcohol-based solution applied to dry skin before dry shaving. The alcohol temporarily removes excess skin oils and stiffens the hair, helping the foil catch and cut hair more efficiently. It evaporates in about 30 seconds, leaving your face ready for a dry shave. Preshave lotions are particularly helpful for men with coarse hair or oily skin who find dry shaving slightly uncomfortable. They are not needed for wet shaving, where gel provides similar benefits. Final Verdict: Should You Shave Wet or Dry With an Electric Razor? If you want the most comfortable, closest shave with the least irritation, wet shaving with a waterproof electric razor is the superior choice. The combination of warm water, a quality shaving gel, and a well-maintained waterproof electric shaver creates ideal conditions for a smooth, skin-friendly shave. However, dry electric shaving remains an excellent option for those who prioritize speed, convenience, and simplicity — and with a good-quality foil or rotary shaver and the right technique, you can absolutely get a great result without any products at all. The smartest approach? Own a waterproof electric razor and switch between wet and dry depending on your situation. Take time for a full wet shave on weekends or when your skin needs extra care — and rely on dry shaving for quick weekday routines or on-the-go touch-ups. The flexibility is one of the great advantages that electric razors offer over manual alternatives. No matter which method you choose, the fundamentals remain constant: keep your blades sharp, use appropriate technique for your razor type, and pay attention to what your skin is telling you. A well-chosen method, applied consistently, will always outperform the "perfect" technique used inconsistently.
VIEW FULL ARTICLE -
 Jun 11,2026
What Is the Best Women's Electric Shaver? A Complete Guide for 2026
The best women's electric shaver overall is one that combines a close, comfortable shave with waterproof design, flexible heads, and gentle foil or rotary technology suited to sensitive skin. Whether you're shaving your legs, underarms, or bikini area, the right electric shaver can save time, reduce irritation, and deliver smooth results without the nicks and cuts that come with manual razors. This guide breaks down everything you need to know — from how electric shavers work to how to choose the best one for your skin type and body area. Why Choose a Women's Electric Shaver Over a Manual Razor? Electric shavers are safer, faster, and more skin-friendly than traditional razors for most women. According to a 2023 consumer survey by Statista, over 41% of women aged 18–44 in the US have switched to electric hair removal devices, citing reduced razor burn and long-term cost savings as top reasons. No cuts or nicks: Electric shavers use protected blades that never directly contact the skin surface, dramatically reducing injury risk. Faster routine: Most electric shavers can cover both legs in under 5 minutes with no prep like shaving cream or water (in dry mode). Cost-effective long term: A quality electric shaver lasts 3–5 years, compared to disposable razors that need replacement every 1–2 weeks. Versatile use: Many models work on legs, underarms, and the bikini line with interchangeable heads. Wet and dry capability: Most modern electric shavers are fully waterproof, safe for use in the shower or bath. Types of Women's Electric Shavers Explained The two primary types of women's electric shavers are foil shavers and rotary shavers, and understanding the difference is key to choosing the best one for your needs. Foil Shavers Foil shavers are the most popular choice for women and deliver a closer, smoother shave on flat skin surfaces. They use a thin, perforated metallic foil over oscillating blades. The foil catches and lifts hairs before the blade cuts them. Foil shavers work best on legs and underarms where the skin is relatively flat. They're especially recommended for sensitive skin because the foil acts as a protective barrier. Rotary Shavers Rotary shavers use circular spinning heads and are better at handling longer or coarser hair. The rotating discs flex independently to follow body contours, making them a practical choice for uneven areas. However, they can be noisier and may cause slightly more friction on very sensitive skin. Feature Foil Shaver Rotary Shaver Closeness of Shave Excellent on flat areas Good on curved areas Best For Legs, underarms Bikini, body contours Sensitive Skin Highly suitable Moderate Hair Length Handled Short to medium Short to long Noise Level Quieter Louder Wet / Dry Use Most models: Yes Most models: Yes Table 1: Foil vs. Rotary Women's Electric Shaver — Feature Comparison Key Features to Look for in the Best Women's Electric Shaver The best women's electric shaver should have at minimum these five core features: waterproof construction, a flexible shaving head, multiple speed settings, a long-lasting battery, and a hypoallergenic foil. 1. Waterproof and Wet/Dry Compatibility A waterproof electric shaver rated at least IPX5 or IPX7 is essential for safe use in the shower. IPX7 means the device can be submerged up to 1 meter for 30 minutes, offering maximum flexibility. Wet shaving with shower gel or foam also reduces friction and is gentler on sensitive or dry skin. Look for devices that explicitly state "fully waterproof" rather than just "splash-proof." 2. Flexible Pivoting Head A multi-directional pivoting head ensures the shaver contours to knees, ankles, and underarms without missing patches. The best women's electric shavers offer heads that flex in at least two axes — left-right and forward-back — to maintain consistent skin contact across curved surfaces. 3. Battery Life and Charging A minimum of 40 minutes of cordless run time is recommended for shaving both legs comfortably. Top-tier models offer 60–80 minutes per charge, with a quick-charge function (e.g., 5 minutes for one full use). USB-C charging has become the modern standard, replacing older proprietary charging docks. 4. Hypoallergenic Blades and Foil Women with sensitive skin should specifically seek out shavers with hypoallergenic stainless steel or titanium-coated foils. These minimize the risk of irritation, ingrown hairs, and post-shave redness. A micro-textured or cushioned foil design also adds a layer of protection for thin or easily irritated skin. 5. Attachments and Accessories The most versatile women's electric shavers come with interchangeable heads for different body zones. Common attachments include a bikini trimmer comb, a precision trimmer cap, and an exfoliation brush head. Some premium models also include a facial shaving head for peach fuzz or upper lip hair removal. Best Women's Electric Shaver by Body Area Different body areas have distinct requirements, and the best women's electric shaver for legs is not always the best for the bikini line. Below is a breakdown by zone. Best for Legs For legs, prioritize a wide shaving head (at least 4 cm) and a long battery life. A wider foil means fewer strokes, reducing shaving time and skin irritation. Pivoting heads that navigate knees and ankles smoothly are critical. A model with a 5-foil system or dual-foil architecture will capture more hairs in a single pass, minimizing the need for repeated strokes that can cause redness. Best for Underarms The underarm area has thin, creased skin and hair that grows in multiple directions. A compact, maneuverable shaver head works best here. A rotary-style head or a smaller foil head with multi-directional capability handles the unique geometry of the underarm effectively. Gentleness and skin-contact comfort should be the top priority for this zone. Best for Bikini Area The bikini zone requires a precision trimmer or a narrow trimmer attachment rather than a full foil head. Look for a shaver that includes a dedicated bikini trimmer attachment with adjustable comb lengths (e.g., 3 mm, 6 mm, 9 mm). Hypoallergenic foil is especially important here due to the skin's heightened sensitivity. A fully waterproof design is also mandatory for safety and comfort. Best for Face Facial hair removal in women — including peach fuzz, upper lip, and chin hair — requires a micro-precision trimmer or a dedicated facial shaving head. These are typically much smaller than body shavers, designed to contour around lips, the jawline, and cheeks without over-removing fine facial hair. Some all-in-one models include a facial shaving head as an optional attachment. Women's Electric Shaver Feature Comparison Table Use this table to quickly compare the most important features when selecting the best women's electric shaver for your specific needs. Feature Budget Range Mid Range Premium Range Waterproof Rating IPX4 (splash-proof) IPX5–6 IPX7 (submersible) Battery Life 20–30 min 40–60 min 60–80+ min Pivoting Head Fixed or 1-axis 2-axis flex Multi-axis + pressure sensor Attachments Included None or 1 2–3 heads 4–6 heads Hypoallergenic Foil Sometimes Usually Always Price Estimate (USD) $15–$35 $40–$80 $90–$180+ Table 2: Women's Electric Shaver Features by Price Range How to Get the Best Results from Your Women's Electric Shaver Using proper technique maximizes the closeness of your shave and minimizes irritation — even the best women's electric shaver will underperform if used incorrectly. Prep Your Skin Before Shaving For dry shaving, ensure the skin is completely dry and free of lotions or oils, which can clog the foil. For wet shaving, apply a thin layer of shaving gel or cream to reduce resistance and protect the skin. Exfoliating 24 hours before shaving lifts ingrown hairs and removes dead skin cells, resulting in a significantly closer shave. Use the Correct Technique Always move a foil shaver in slow, straight strokes against or across the direction of hair growth. For rotary shavers, use small circular motions. Keep the shaver at a 90-degree angle to the skin surface and avoid pressing too hard — the motor does the work. On the legs, start at the ankle and work upward. Post-Shave Care Rinse the shaved area with cool water to close pores, then apply a fragrance-free, alcohol-free moisturizer or soothing gel (such as aloe vera) to calm the skin. Avoid tight clothing for a few hours after shaving sensitive areas like the bikini line, as friction can trigger irritation or ingrown hairs. Cleaning and Maintenance Clean the shaving head after every use by rinsing it under warm running water (if waterproof) or using the cleaning brush provided. Most premium shavers include a self-cleaning station. Replace foil heads every 12–18 months to maintain shaving performance, since worn foils can cause pulling and reduced closeness. Electric Shaver vs. Other Women's Hair Removal Methods An electric shaver is the fastest and most cost-effective hair removal method for most women, though the right choice depends on your desired results and pain tolerance. Method Smoothness Pain Level Regrowth Time Long-Term Cost Electric Shaver Very good None 1–3 days Low Manual Razor Excellent Low (cut risk) 1–2 days Medium Epilator Excellent High 2–4 weeks Low Waxing Excellent High 3–6 weeks High (salon) Laser Hair Removal Permanent Moderate Months–years Very High Depilatory Cream Good None 3–6 days Medium Table 3: Women's Hair Removal Methods Compared — Smoothness, Pain, and Cost Best Women's Electric Shaver for Sensitive Skin Women with sensitive skin should look specifically for hypoallergenic foil shavers with a skin-guard feature and moisturizing strips. Sensitive skin reacts poorly to repeated strokes, so a shaver that captures more hair in a single pass is critical. Key specifications to prioritize include: Hypoallergenic stainless steel foil — avoids metal allergy reactions common with cheaper nickel-plated foils. Skin-tension guard — stretches the skin slightly ahead of the foil for a cleaner cut with fewer passes. Moisturizing or soothing strip — deposits a thin layer of aloe or vitamin E during each shaving stroke to calm the skin in real time. Low-vibration motor — reduces the mechanical stimulation that causes post-shave redness on reactive skin. Gentle speed setting — a lower RPM mode for sensitive areas like the bikini line or inner thigh. How Long Does a Women's Electric Shaver Last? A well-maintained women's electric shaver typically lasts 3 to 5 years, though this depends on usage frequency and care. The shaver body (motor and handle) generally outlasts the replaceable foil heads and blades. Most manufacturers recommend replacing foil heads every 12–18 months, as the micro-perforations in the foil gradually widen with use, reducing cutting efficiency and increasing the chance of hair pulling. To maximize the lifespan of your electric shaver: Clean after every use to prevent hair and debris buildup in the foil. Apply a drop of clipper oil to the foil once a month to lubricate the blades. Store in the protective cap or travel case to prevent foil damage. Avoid dropping the shaver, as foils can crack or dent easily. Charge the battery according to manufacturer instructions — avoid leaving on charge indefinitely. Frequently Asked Questions About Women's Electric Shavers Q: Can I use a women's electric shaver on my face? Yes, but only with a shaver designed or equipped for facial use. Standard body shavers are too large and powerful for delicate facial skin. Look for a model with a dedicated facial shaving head or a compact precision trimmer attachment. These are designed to remove fine vellus (peach fuzz) hair and coarser facial hair gently and efficiently without causing redness. Q: Does shaving with an electric shaver make hair grow back thicker? No — this is a common myth. Shaving, whether with an electric shaver or a manual razor, cuts hair at the surface without affecting the follicle. Because the cut creates a blunt tip (compared to the naturally tapered tip of unshaved hair), regrowth can feel slightly coarser to the touch, but the hair is not actually thicker or darker. Studies have repeatedly confirmed there is no physiological mechanism by which shaving changes hair texture or growth rate. Q: Is a women's electric shaver better than a men's electric shaver for female use? Women's electric shavers are specifically engineered for female body hair, which is typically finer and distributed differently than male facial hair. Women's shavers feature wider shaving heads for faster leg coverage, longer handles for comfortable grip along the leg, and foil configurations optimized for thinner hair. Men's shavers can be used in a pinch, but they are designed for coarser beard hair on flat facial surfaces and will not perform as well on curved female body areas. Q: Can I use a women's electric shaver in the shower? Yes, as long as the shaver is rated waterproof (IPX5 or higher). Always check the manufacturer's waterproof rating before using any electric device in wet conditions. Shower shaving with gel or foam is gentler on skin and can deliver a smoother result by softening the hair. Never use a shaver that is only "splash-resistant" or lacks an explicit waterproof rating in the shower or bath. Q: How often should I replace the foil on my women's electric shaver? Most manufacturers recommend replacing the foil and blade cassette every 12 to 18 months, depending on use frequency. If you shave daily, aim for annual replacement. Signs that your foil needs replacing include increased pulling sensations, reduced closeness, or visible damage to the foil mesh. Using a worn foil not only delivers a worse shave but can also irritate the skin. Q: What is the difference between an electric shaver and an epilator? An electric shaver cuts hair at the skin surface, similar to a razor, while an epilator removes hair from the root by mechanically grasping and pulling multiple hairs simultaneously. Epilators provide longer-lasting smoothness (2–4 weeks vs. 1–3 days for a shaver) but are significantly more painful, especially on sensitive areas. Electric shavers are painless and much faster, making them the preferred daily-use option for most women. Q: Are women's electric shavers travel-friendly? Most modern women's electric shavers are compact, lightweight, and designed for travel. Look for models with a universal voltage capability (100–240V), which allows use with any socket worldwide via a suitable adapter. Many shavers also include a lock mode to prevent accidental activation in luggage, and a travel pouch or hard case for protection. Cordless battery-powered shavers (USB-C or rechargeable) are the most convenient for travel since they eliminate the need for wall adapters entirely. Final Verdict: What to Look for in the Best Women's Electric Shaver The best women's electric shaver combines a hypoallergenic foil, a flexible multi-axis pivoting head, full waterproofing (IPX7), a minimum of 40 minutes of battery life, and at least two interchangeable attachment heads. For most women, a foil-type electric shaver in the mid-range ($40–$80) will deliver excellent results for everyday leg and underarm shaving, while a premium model ($90+) becomes worthwhile if you need full-body versatility, longer battery life, or specialized sensitive-skin features. When evaluating your options, prioritize the body areas you shave most frequently, your skin sensitivity level, and whether you prefer wet or dry shaving. Investing in a quality women's electric shaver with replaceable heads is nearly always more economical over two to three years than continuously purchasing disposable razors — and the reduction in irritation, nicks, and prep time makes the switch well worth it for most women.
VIEW FULL ARTICLE -
 Jun 04,2026
How to Clean an Electric Shaver Head: A Complete Step-by-Step Guide
To clean an electric shaver head, rinse it under warm running water after every use, then perform a deeper weekly clean by removing the head, tapping out loose hair clippings, brushing the inner components with the included cleaning brush, and rinsing all parts thoroughly before allowing them to air dry completely. For a monthly deep clean, use a drop of liquid hand soap or a small amount of isopropyl alcohol to dissolve oil and bacteria build-up. This guide covers every method in detail — from daily quick rinses to full disassembly deep cleans — along with a comparison of foil versus rotary shavers, the best cleaning products to use, and answers to the most common questions. Why Cleaning Your Electric Shaver Head Matters A dirty electric shaver head is one of the most common reasons for skin irritation, razor bumps, and a declining quality of shave. When hair clippings, dead skin cells, natural skin oils, and shaving cream residue accumulate inside the shaver head, several problems develop simultaneously. First, the cutting blades and foils become clogged, which forces the motor to work harder and increases friction against the skin — leading directly to irritation, redness, and ingrown hairs. Second, the accumulated organic matter becomes a breeding ground for bacteria. Research published in dermatology journals has found that unwashed shaver heads can harbor thousands of bacteria per square centimeter after just a few days of use, increasing the risk of folliculitis and skin infections. Third, and perhaps most overlooked from a practical standpoint, a dirty electric shaver head wears out significantly faster. The additional strain placed on the motor when blades are clogged shortens both blade life and battery life. Studies from shaver manufacturers show that users who clean their shaver heads after every use extend blade life by up to 60% compared to users who clean weekly or less. Regular cleaning is not just a hygiene habit — it is a cost-saving measure. Foil Shaver vs. Rotary Shaver: How Cleaning Differs Foil shavers and rotary shavers require different cleaning approaches because their internal structures trap hair and debris in fundamentally different ways. Understanding which type you own is the essential first step before cleaning. A foil shaver has a thin, perforated metal screen (the foil) stretched over one or more straight oscillating blades beneath it. Hair enters through the perforations in the foil and is cut by the reciprocating blade underneath. Debris accumulates primarily between the foil and the blade, and — because the cutting system is linear — it is relatively easy to tap out and brush clean. A rotary shaver has two, three, or sometimes four circular cutting heads, each containing a spinning cutter beneath a circular guard. Hair is drawn into the slots in the circular guard and cut by the spinning blade below. Because the cutter is circular and spins at high speed, hair clippings tend to pack more tightly into the cutter assembly, often requiring more thorough rinsing or disassembly to clean properly. Feature Foil Shaver Head Rotary Shaver Head Cutting element Linear oscillating blade under foil screen Spinning circular cutter under round guard Where debris collects Between foil and blade; easy to tap out Inside cutter hub; packs tightly Quick-rinse effectiveness Very good Good; longer rinse recommended Ease of disassembly for deep clean Moderate — foil is fragile Easy — heads pop off individually Foil/guard fragility High — foil dents easily Lower — plastic guard is robust Brush cleaning suitability Good for blade; avoid foil Excellent for all surfaces Recommended clean frequency After every use (quick); weekly (deep) After every use (quick); weekly (deep) Table: Key differences between foil and rotary electric shaver heads that affect how each should be cleaned. Daily Quick Clean: After Every Shave A 30-second rinse under warm running water after every shave is the single most impactful cleaning habit you can build for your electric shaver head. Done consistently, this one step prevents the majority of debris build-up and eliminates the need for aggressive deep cleaning sessions. For Waterproof Shavers (Wet/Dry Models) Turn the shaver on while holding it under warm running water. Running the motor while rinsing allows the oscillating or spinning blades to actively flush out trapped hair clippings — this is significantly more effective than rinsing a switched-off shaver. Hold under the stream for 20 to 30 seconds, rotating so water flows through the shaver head from multiple angles. Turn the shaver off and give the head a gentle tap against your palm to dislodge any remaining loose clippings. Shake off excess water and leave the shaver head open or detached in a well-ventilated area to air dry. Never store a wet shaver head in a closed case — moisture trapped in the cutting chamber promotes corrosion and bacterial growth. For Non-Waterproof Shavers (Dry-Only Models) Never submerge or rinse a dry-only shaver under water — doing so will cause electrical damage and void the warranty. Check the shaver's IPX rating: a rating of IPX4 or lower means the shaver is splash-resistant at most, not waterproof. With the shaver off, tap the head gently against your palm or the edge of the sink to knock out loose hair. Use the small cleaning brush that came with the shaver (or a soft toothbrush) to sweep clippings out of the cutting area. For foil shavers, brush the inner blade lightly in a side-to-side motion — never brush directly on the foil screen, as the thin metal is easily dented. Use a can of compressed air if available — a 1-second burst directed into the shaver head dislodges fine hair particles and skin debris that brushing alone may miss. Weekly Deep Clean: Full Disassembly Method A weekly deep clean using full disassembly is essential for removing the oil, dead skin cells, and compacted hair debris that daily rinsing cannot reach. This process takes approximately 5 to 10 minutes and significantly extends blade life and shaving performance. What You Need Cleaning brush (supplied with shaver, or a soft-bristle toothbrush) Warm water Liquid hand soap or dedicated shaver cleaning solution Isopropyl alcohol (70%) — optional, for sanitizing Clean dry towel or microfiber cloth Shaver lubricating oil — optional but recommended Step-by-Step: Deep Cleaning a Foil Shaver Head Unplug or power off the shaver completely before disassembly. Remove the shaver head frame by pressing the release button or sliding the frame off according to your model's instructions. The foil screen and blade cassette should now be accessible. Carefully lift the foil screen away from the blade cassette. Handle the foil by its plastic frame only — never touch the thin metal foil mesh with your fingertips, as oils from skin can cause corrosion, and even light pressure can dent it permanently. Tap the blade cassette gently over a sink or waste bin to remove loose clippings. Brush the blade cassette with the cleaning brush using short, even strokes. Do not brush the foil screen — instead, hold the foil under warm running water and let the water flow do the work. If the shaver is waterproof, add one small drop of liquid hand soap to the foil and blade separately and rinse under warm water for 20 to 30 seconds each. The soap dissolves skin oil and product residue that water alone cannot remove. Rinse all parts thoroughly with clean warm water to remove all soap residue. Soap left on the cutting elements will degrade the metal over time. Air dry completely — lay parts on a clean dry towel for at least 30 minutes before reassembling. Reassembling a wet shaver traps moisture inside, accelerating corrosion. Apply one drop of shaver oil to the blade before reassembling. This reduces friction between the foil and blade, extends component life, and improves glide on the next shave. Reassemble carefully — align the foil frame and snap it securely back into position. Step-by-Step: Deep Cleaning a Rotary Shaver Head Power off and remove the head assembly by pressing the release mechanism. Most rotary shavers have a single button that releases the entire circular head frame. Pop each individual cutter head out of the frame. Rotary cutter heads typically lift straight out; they are color-coded or numbered so you can return each to its original position — important, because blades and guards wear together and should not be mixed between positions. Rinse the cutter frame under warm running water, brushing any trapped hair from the slots with the cleaning brush. For each individual cutter unit, hold it under warm running water and use the cleaning brush to work out compacted hair from around the circular blade. Rotate the cutter by hand under the water to help dislodge debris from all angles. Add a tiny drop of liquid soap to each cutter, work it in briefly with the brush, then rinse thoroughly. Inspect each cutter guard for any cracks or damage. A cracked guard can nick the skin — replace immediately if damaged. Air dry all components on a clean towel for at least 30 minutes. Apply one drop of shaver lubricating oil to the top of each spinning cutter before reassembling. Reassemble in the correct order — return each cutter head to its original numbered or colored position in the frame. Monthly Sanitizing Clean: Killing Bacteria and Removing Oil Build-Up A monthly sanitizing clean using isopropyl alcohol eliminates bacteria and dissolves the protein and oil deposits that water and soap cannot fully address. This step is particularly important for people with sensitive skin, acne-prone skin, or anyone who has experienced post-shave breakouts. Isopropyl Alcohol Method Use 70% isopropyl alcohol — not 90% or higher. At 70% concentration, the alcohol stays in contact with surfaces long enough to effectively kill bacteria. Higher concentrations evaporate too quickly to be fully effective as a disinfectant. Disassemble the shaver head as described in the weekly deep clean section above. Perform the standard rinse and brush clean first. Alcohol is most effective as a final sanitizing step, not a substitute for physical cleaning. Pour a small amount of 70% isopropyl alcohol into a shallow dish. Submerge the metal cutting components (blades and foils or cutter heads) for 30 to 60 seconds. Remove and allow to air dry completely — alcohol evaporates quickly and leaves no residue, so no rinsing is required. Do not soak plastic components in alcohol for extended periods — prolonged contact can cause some plastics to crack or discolor. Apply a drop of shaver oil before reassembling, as alcohol strips any lubrication from the blades. Best Cleaning Products for Electric Shaver Heads: Compared The right cleaning product makes a significant difference in how thoroughly and safely you can clean an electric shaver head. The table below compares the most commonly used options. Product Grease Removal Bacteria Kill Safe for Metal Safe for Plastic Cost Warm water only Low Low Yes Yes Free Liquid hand soap Good Moderate Yes Yes Very Low Isopropyl alcohol (70%) Good Excellent Yes Short exposure only Low Dedicated shaver cleaning solution Excellent Excellent Yes Yes Medium Dish soap (degreaser) Very Good Moderate Yes (rinse well) Yes Very Low Bleach / harsh chemicals Not recommended High No — corrodes metal No — degrades plastic Low Table: Comparison of common cleaning products for electric shaver heads rated by cleaning effectiveness, material safety, and cost. How Often Should You Clean Your Electric Shaver Head? The ideal cleaning schedule for an electric shaver head combines a daily quick rinse with a weekly deep clean and a monthly sanitizing session. Skipping any of these tiers leads to a build-up of compounding problems: daily skips cause weekly clogs, weekly skips cause monthly bacterial colonies, and monthly skips cause accelerated blade wear. Cleaning Tier Frequency Time Required What It Removes Method Quick rinse After every shave 30 seconds Loose hair clippings, surface debris Water rinse (motor on) or brush Deep clean Weekly 5 to 10 minutes Packed hair, skin oil, product residue Disassembly, brush, soap, rinse Sanitizing clean Monthly 10 to 15 minutes Bacteria, protein deposits, fungal spores Isopropyl alcohol soak or cleaning solution Blade replacement Every 12 to 18 months 5 minutes Worn cutting edges; restores full performance Replace foil and blade or cutter cassette Table: Recommended cleaning schedule for electric shaver heads organized by frequency, time investment, and what each tier removes. How to Lubricate an Electric Shaver Head After Cleaning Lubricating the shaver head after every deep clean is as important as the cleaning itself — without adequate lubrication, even a perfectly clean blade will cause friction, skin drag, and premature wear of both the foil and the blade. The correct approach is to apply a single drop of dedicated shaver lubricating oil to the top of the cutting element before reassembling the head, then run the shaver for 5 to 10 seconds to distribute the oil evenly across all cutting surfaces. Wipe away any excess oil with a clean cloth. If you do not have dedicated shaver oil, a drop of light mineral oil or pure sewing machine oil works as an effective substitute. Do not use cooking oils, olive oil, or coconut oil — vegetable and plant-based oils go rancid quickly, create sticky residue inside the cutting mechanism, and can promote bacterial growth. Regular lubrication can extend blade and foil life by an additional 30% to 50% beyond what cleaning alone achieves, according to information provided by shaver component manufacturers. Signs Your Electric Shaver Head Needs Immediate Cleaning or Replacement Certain warning signs indicate that your electric shaver head has reached a level of soiling or wear that requires immediate attention — either an emergency deep clean or replacement of the cutting components. Tugging or pulling sensation during shaving: This is the most common sign that the blades are clogged. Hair is catching and being pulled rather than cut cleanly. A deep clean will usually resolve this immediately. Skin redness or irritation after shaving: When blades are partially clogged, they create uneven pressure and increased friction against the skin — a direct path to razor burn and irritation. Noticeable increase in shaver noise: A clean shaver runs quietly and smoothly. An increase in mechanical noise — especially a grinding or buzzing quality — often indicates that packed debris is interfering with the motor or blade movement. Visible discoloration or brown residue on blades: Oxidized skin oil and decomposing hair create a brownish film on blades that is a clear indicator of significant build-up. This requires a full deep clean and sanitizing session. Unpleasant odor from the shaver head: Any smell coming from the shaver head — even a faint metallic or organic smell — indicates bacterial colonization. Perform an immediate disassembly, soap clean, and alcohol sanitizing session. Shave quality does not improve after cleaning: If deep cleaning and lubrication do not restore smooth, comfortable shaving performance, the foils or blades have reached the end of their service life and need replacement. Most manufacturers recommend replacing foils and blades together every 12 to 18 months. Automatic Cleaning Stations: Are They Worth It? Automatic cleaning stations that charge and clean your shaver simultaneously are a convenient but not strictly necessary addition to any shaver cleaning routine. They are worth the investment for users who shave daily and want to minimize manual cleaning effort. These stations work by submerging the shaver head in a proprietary cleaning fluid — typically containing alcohol, lubricant, and fragrance — while running the shaver's motor to flush debris. The cycle usually takes 30 to 60 minutes and leaves the head clean, sanitized, lubricated, and charged. The main drawback is ongoing cost: the proprietary cleaning cartridges used by most cleaning stations need to be replaced every 1 to 3 months depending on use, adding an annual cost of approximately $30 to $80 per year. The same cleaning result can be achieved manually using the methods described in this guide for a fraction of that cost — with liquid hand soap and isopropyl alcohol costing only a few dollars per year. Cleaning stations are best suited for users who own a waterproof, wet/dry compatible shaver and who consistently find that manual cleaning feels inconvenient enough to skip. For users who are willing to spend 5 to 10 minutes weekly on a manual clean, the station's benefits do not outweigh its ongoing cartridge costs. Common Mistakes to Avoid When Cleaning an Electric Shaver Head Several widespread cleaning mistakes actively damage electric shaver heads, reduce blade life, or create skin health risks — knowing what not to do is just as important as the cleaning steps themselves. Rinsing a non-waterproof shaver under water: Always verify your shaver's IPX waterproof rating before any water exposure. A dry-only shaver rinsed under water will suffer immediate electrical damage and is a safety hazard. Brushing directly on the foil screen: The thin metal foil on a foil shaver dents and punctures easily. Brush only the blade cassette — clean the foil with water only. Reassembling the shaver while components are still wet: Trapped moisture causes corrosion and bacterial growth inside the cutting mechanism. Always air dry fully — at least 30 minutes — before reassembly. Mixing rotary cutter heads between positions: Rotary cutter heads and guards wear as paired units. Swapping them between positions introduces mismatched wear patterns that accelerate damage and reduce shave comfort. Using bleach, hydrogen peroxide, or abrasive cleaners: These corrode metal blades and degrade plastic components. Stick to soap, water, or isopropyl alcohol. Over-lubricating the shaver head: More than one drop of oil is too much. Excess oil attracts dust and hair particles, creating a sticky paste that clogs the cutting system faster than normal use would. Ignoring the shaver body and charging contacts: Hair clippings and skin oils settle on the shaver body and charging pins over time. Wipe the body with a slightly damp cloth weekly and clean the charging contacts with a dry cotton swab to maintain reliable charging and prevent corrosion. Frequently Asked Questions Q: Can I use water to clean any electric shaver head? A: Only if your shaver is rated as waterproof — typically indicated by an IPX5 or higher rating on the product label or in the owner's manual. Dry-only shavers must be cleaned with a brush or compressed air only. Running water through a non-waterproof shaver will cause electrical damage and may create a safety hazard. When in doubt, check the IPX rating before any water exposure. Q: How do I clean an electric shaver head without the cleaning brush? A: A soft-bristle toothbrush is the best substitute for the included cleaning brush. Use an old toothbrush dedicated solely to shaver cleaning — never share it with dental use. A small paintbrush with soft bristles also works well for reaching into narrow spaces around the blade assembly. Avoid stiff-bristle brushes, which can scratch the foil. Q: How long does it take for an electric shaver head to dry after cleaning? A: Most electric shaver head components need a minimum of 30 minutes of air drying time after rinsing before they are safe to reassemble. For maximum safety and to prevent any corrosion risk, allowing 1 to 2 hours of air drying is ideal. You can speed up the process by gently shaking off excess water and placing components on a dry microfiber towel in a well-ventilated area. Never use a hair dryer on high heat — excessive heat can warp plastic components or damage the foil. Q: Can I clean an electric shaver head with hand sanitizer? A: Hand sanitizer can be used as an emergency sanitizing measure, but it is not ideal for routine cleaning. Gel-based hand sanitizers contain emollients and thickeners that leave a sticky residue on shaver components. Alcohol-based spray sanitizers are cleaner but still less effective than pure 70% isopropyl alcohol. If hand sanitizer is your only available option, rinse the components thoroughly with water after application and allow to dry fully before reassembling. Q: Why does my electric shaver smell bad even after cleaning? A: A persistent odor after cleaning usually indicates a bacterial colony that a standard water-and-soap clean has not fully eliminated. Perform a full disassembly and soak the metal components in 70% isopropyl alcohol for 60 seconds, then air dry completely. If the odor persists after this step, the issue may be inside the shaver body itself — hair clippings and skin oils can work their way into the motor housing over time. In this case, a compressed air blast directed into the body vents may help; if not, the shaver may need professional cleaning or the components may need replacement. Q: How do I know when to replace the shaver head instead of just cleaning it? A: Replace the shaver head cutting components when cleaning and lubrication no longer restore smooth, comfortable shaving performance. Most manufacturers recommend replacing foil and blade cassettes every 12 to 18 months, and rotary cutter heads every 12 to 24 months, depending on frequency of use. Other indicators include visible nicks or holes in the foil, a grinding sensation that persists after cleaning, or shaving that consistently requires multiple passes over the same area despite a clean and lubricated head. Q: Is it safe to clean an electric shaver head while it is charging? A: No — always unplug the shaver from its charger completely before cleaning, especially before any water contact. Even waterproof shavers with an IPX7 rating should not be rinsed while connected to a power source. The waterproof rating applies to the shaver body under normal operating conditions, not to the charging port or electrical connection. Cleaning a plugged-in shaver is both a safety hazard and likely to cause damage to the charging system. Conclusion: Build a Three-Tier Cleaning Routine Knowing how to clean an electric shaver head properly comes down to one core principle: match the cleaning intensity to the frequency of use, and never let debris sit long enough to harden and compact. A 30-second daily rinse, a 10-minute weekly deep clean, and a monthly alcohol sanitizing session form a three-tier routine that keeps your shaver head hygienic, performing at its best, and lasting significantly longer between blade replacements. Whether you own a foil or rotary shaver, the principles are identical: remove hair mechanically, dissolve oils chemically, sanitize bacterially, lubricate mechanically, and dry completely before storing. Follow these steps consistently and your electric shaver head will deliver a comfortable, close, irritation-free shave for years — not months. The most important single action? Rinse after every shave. This one habit, done for just 30 seconds, prevents 80% of the problems that result from infrequent cleaning and makes every subsequent deep clean dramatically faster and easier.
VIEW FULL ARTICLE -
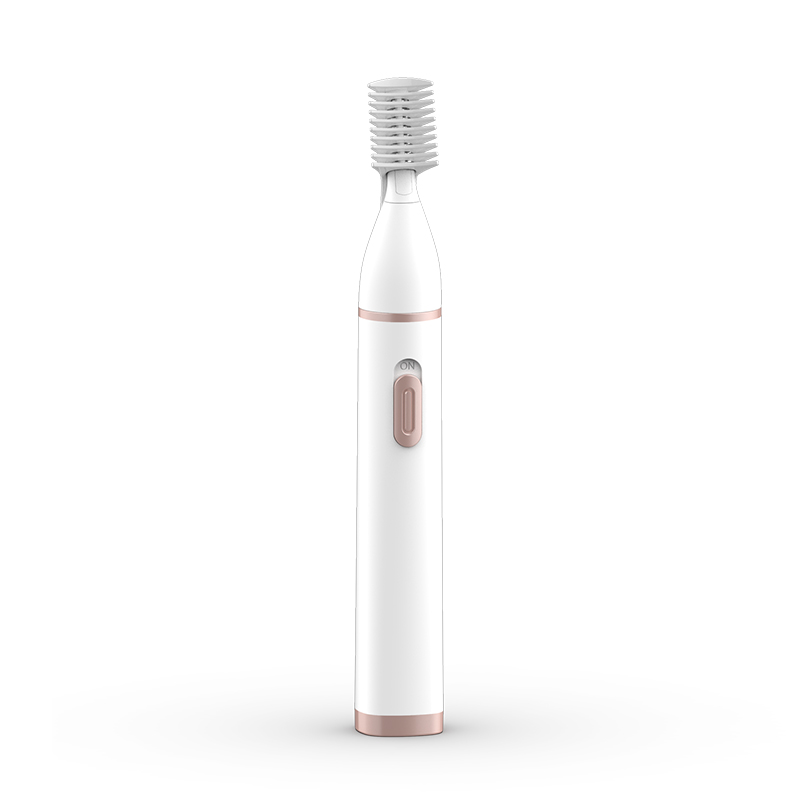 May 29,2026
Which Electric Razor Gives the Closest Shave?
Rotary electric razors generally deliver a closer shave for men with heavy, coarse, or multi-directional beard growth, while foil electric razors tend to provide a more precise, skin-level cut for men with fine to medium hair growing in a consistent direction. Between the two, high-performance foil shavers are most consistently rated by grooming experts as producing results closest to a traditional wet shave — often achieving a shave within 0.05 mm of skin level under optimal conditions. That said, the "closest shave" depends heavily on your beard type, skin sensitivity, shaving technique, and how well the razor is maintained. This guide breaks down every factor that determines shaving closeness so you can make the right choice for your face. Foil vs. Rotary Electric Razors: Which Shaves Closer? Foil electric razors are the better choice for a close, clean shave in the majority of use cases — particularly for men who shave daily or every other day and have straight or moderately coarse facial hair. Rotary razors close the gap when dealing with longer, denser, or highly irregular growth patterns. Understanding the mechanical difference between the two designs explains why this is the case. A foil razor uses oscillating straight blades that move back and forth beneath a thin, perforated metal foil. The foil presses flat against the skin, guiding hairs into the perforations at a 90-degree angle so the blade cuts them as close to the skin surface as possible. This geometry is inherently precise. A rotary razor, by contrast, uses circular spinning blades beneath round heads that can pivot and flex independently. This design excels at following the contours of the face and neck and handling hairs that grow in multiple directions — but the circular cutting motion does not consistently bring the blade as close to the skin as a foil design. Feature Foil Razor Rotary Razor Shave Closeness Excellent — near blade-to-skin contact Good — better for multi-directional growth Best Hair Type Fine to medium, straight growth Coarse, dense, irregular growth Skin Sensitivity Better for sensitive skin Gentler on contoured areas Shaving Motion Straight, linear strokes Circular, multi-directional passes Precision/Edging Excellent — trim heads common Limited Noise Level Moderate to high Generally quieter Wet/Dry Use Many models support both Many models support both Ideal For Daily shavers, clean-shaven look Infrequent shavers, beard shaping Table 1: Side-by-side comparison of foil and rotary electric razors across key performance factors. Key Features That Determine How Close an Electric Razor Shaves The closeness of an electric shave is determined by blade sharpness, motor speed, foil design, and how well the razor adapts to facial contours — not simply by whether it is a foil or rotary model. Here is a breakdown of the most important technical factors to evaluate. 1. Blade and Foil Quality The sharpness and metallurgical quality of the blades determine how cleanly hairs are severed. Premium electric razors use blades made from high-grade stainless steel or titanium-coated steel, which retain their edge significantly longer than standard blades. The foil itself matters just as much — thinner foils allow the blade to cut closer to the skin, while ultra-fine perforation patterns capture more hairs per pass, reducing the number of strokes needed. High-end foil razors feature foil thicknesses as low as 0.05 mm, compared to 0.08–0.10 mm on budget models. 2. Motor Speed (Strokes Per Minute) Higher motor speeds translate directly to a closer, more efficient shave. Entry-level electric razors typically operate at 6,000 to 8,000 strokes per minute (SPM), while premium models can reach 14,000 to 20,000 SPM. At higher speeds, the blades catch and cut each hair more consistently without tugging or pulling, and the time the foil spends in contact with each section of skin is more productive. For reference, a professional-grade foil shaver at 14,000 SPM performs approximately twice as many cutting actions per second as a budget model at 7,000 SPM. 3. Number of Cutting Elements More cutting heads or foil sections mean broader coverage per stroke and the ability to handle different hair types simultaneously. Most premium foil razors feature 3 to 5 foil sections, each targeting a different hair length or type — a middle foil for long hairs, flanking foils for short, flat-lying hairs, and trimmer elements for longer stubble and sideburn edges. This multi-foil architecture is one of the most significant differences between a razor that delivers a truly close shave and one that leaves stubble behind. 4. Pivot and Flex Mechanism A razor head that cannot flex or pivot with the contours of the face will leave uncut patches on curved areas like the jaw, chin dimple, and upper lip. High-performance electric razors feature multi-directional pivot systems — often capable of flexing across 5 or more independent axes — that keep the cutting surface in consistent contact with the skin regardless of facial geometry. This adaptive contact is critical for achieving a uniform close shave across the entire face. 5. Wet vs. Dry Shaving Capability Using an electric razor with shaving gel or foam in the shower (wet shaving) consistently produces a closer result than dry shaving. Shaving gel softens facial hair by up to 40% according to grooming research, making it easier for the blades to cut at skin level without resistance. Razors that are rated for both wet and dry use — typically waterproofed to IPX7 standard (submersible to 1 meter) — give you the flexibility to use this technique. If achieving the closest possible electric shave is your priority, always choose a wet/dry compatible model and use it with a lubricating shaving cream or gel. Electric Razor vs. Manual Razor: How Close Can Electric Really Get? A high-quality electric razor can get within 90–95% of the closeness of a well-executed wet shave with a manual razor blade, but it rarely matches it exactly. Understanding this gap — and when it matters — will help you set realistic expectations. A manual razor blade, particularly a multi-blade cartridge or a well-honed safety razor, physically contacts the skin and shears hair at or fractionally below the skin surface. This is why traditional wet shaving leaves skin feeling genuinely smooth to the touch. Electric razors, even the best foil models, maintain a thin barrier (the foil) between blade and skin — this is what prevents cuts, but it also means the cutting point is always a fraction of a millimeter above skin level. For everyday professional appearance — clean shave visible to others — a premium electric razor is entirely comparable to a manual razor. Where the difference becomes perceptible is in the tactile feel of running a hand against the grain immediately after shaving. Most men report being fully satisfied with the closeness of a top-tier electric razor for daily or near-daily use, especially once their skin adapts to electric shaving (typically a 2–4 week adjustment period). Factor Premium Electric Razor Manual Razor (Multi-Blade) Shave Closeness 90–95% of manual Maximum (at/below skin level) Risk of Cuts/Nicks Very low Moderate Skin Irritation Low (especially foil) Moderate to high (razor burn risk) Time to Shave 2–5 minutes 5–10 minutes Running Cost Low (replacement heads 1–2x/year) Moderate (cartridge replacement) Suitable for Sensitive Skin Yes With caution Travel Convenience Excellent Good (TSA blade rules apply) Table 2: Comparison of premium electric razors versus manual multi-blade razors across key performance and convenience metrics. Electric Razor Performance by Beard Type: What Works Best for You? The closest-shaving electric razor for you depends almost entirely on your specific beard type — there is no universally "best" razor for all men. Here is how to match razor technology to your facial hair characteristics. Fine or Light Facial Hair Men with fine, light facial hair have the easiest path to a close electric shave. Both foil and rotary razors perform well on fine hair, but a foil razor with a multi-foil head will capture fine, flat-lying hairs most efficiently. Look for models with a dedicated flat-lying hair foil — sometimes marketed as a "finishing" or "skin comfort" foil — which is specifically designed to lift and cut hairs that don't stand upright. Medium to Coarse Facial Hair This is the most common beard type and the category where foil razor technology has made the most significant advances. A high-performance foil razor with a powerful motor (10,000+ SPM), a titanium-coated blade system, and at least three distinct foil zones is the optimal choice. For men with coarse hair who shave daily, premium foil shavers consistently outperform rotary models for closeness. If you have coarse hair but shave less frequently (every 2–3 days), a rotary shaver may handle the longer stubble more comfortably before the foil razor finishes the job. Dense, Multi-Directional, or Curly Beard Growth For men with dense, curly, or heavily multi-directional beard growth — common in men of African and Middle Eastern descent — a rotary razor with independently flexing heads is generally the closer-shaving choice. The rotary design's ability to follow circular, curved hair shafts and adjust to growth in multiple directions within a small area makes it better suited to this hair profile. Multi-head rotary razors with at least three independently adjustable heads are ideal. Heavy Stubble (3 to 5 Days of Growth) Standard foil razors are not designed for cutting heavy stubble and will often pull or jam when used on 3+ days of growth without preparation. For heavy stubble, look for foil razors that include a dedicated long-hair trimmer element (a set of wider-gap blade teeth at the top or bottom of the head) that pre-cuts longer hairs before they pass through the foil. Alternatively, use a beard trimmer to reduce the stubble to approximately 1 mm first, then follow with a foil razor for the closest finish. How to Get the Closest Shave from Any Electric Razor: Technique Tips Even the best electric razor will underperform if used incorrectly — proper technique can improve shave closeness by as much as 20–30%. Follow these steps for the best results every time. Wash your face with warm water first: Warm water opens pores and softens facial hair, making it easier for blades to cut cleanly. This alone makes a noticeable difference in shave closeness, particularly for men with coarse or thick hair. Use a pre-shave lotion or oil: A dedicated electric razor pre-shave product lifts hairs away from the skin and reduces friction between foil and face. Studies on pre-shave lubricants show they can reduce shaving friction by up to 35%, allowing the blade to cut closer with less pressure. Stretch the skin taut: Using your free hand to gently pull the skin taut in the shaving area creates a flatter, more consistent surface for the foil or rotary head to press against, improving contact and cutting efficiency — especially on the neck and jawline. Use light, consistent pressure: Pressing too hard does not improve closeness and increases skin irritation. Let the razor's motor and blade speed do the work. Use only enough pressure to keep the foil in contact with the skin — typically equivalent to the weight of the razor itself. Shave against the grain for closeness: For foil razors, shaving against the direction of beard growth is generally more effective for a close finish. For rotary razors, a circular motion is recommended. Learn your grain pattern before developing a routine. Make multiple short passes, not long strokes: Short, overlapping strokes covering 2–3 cm at a time give the blade more time to capture each hair versus long sweeping motions that rush the foil across the skin. Allow an adaptation period: Switching from a manual razor to an electric razor requires a skin and hair adaptation period of approximately 2 to 4 weeks. During this time, shave results will be suboptimal. After adaptation, most men report a significant improvement in shave closeness and skin comfort. How Maintenance Affects Shave Closeness A poorly maintained electric razor can lose up to 30% of its cutting effectiveness within a year, dramatically reducing shave closeness. Maintenance is one of the most overlooked factors in electric razor performance. Replacing Blades and Foils Electric razor blades and foils dull over time. Manufacturers typically recommend replacing the foil and blade cassette every 12 to 18 months for daily shavers, or every 18–24 months for less frequent use. A sharp, fresh cutting system can restore shave closeness to like-new levels instantly. Many men who complain their electric razor "doesn't shave close anymore" find the issue is simply worn blades — not a fundamental limitation of the razor itself. Cleaning After Every Use Hair clippings, skin cells, and shaving product residue accumulate between the blades and foil after each shave. This buildup creates friction that slows blade speed and reduces cutting effectiveness. Rinse or brush out the shaver head after every use. For models with a cleaning station, run a full cleaning cycle at least twice per week. Tests on electric razor cleaning frequency show that razors cleaned after every use maintain their initial shave performance up to 3 times longer than razors cleaned weekly. Lubrication Applying a single drop of light machine oil or dedicated razor lubricant to the cutting heads every 2–3 weeks reduces metal-on-metal friction and keeps blade speed optimal. This is especially important for foil razors, where the high-speed oscillation of blades against a thin foil creates significant wear without adequate lubrication. Many automatic cleaning stations include a lubricating agent in the cleaning solution, making this step effortless for users of those systems. Entry-Level vs. Mid-Range vs. Premium Electric Razors: Does Price Equal Closeness? Yes — up to a point. Premium electric razors (above $150) consistently outperform budget models for shave closeness, but the performance gap between mid-range ($80–$150) and premium ($150–$350+) is much smaller than between entry-level and mid-range. Price Tier Typical SPM Foil Zones Pivot Axes Wet/Dry Shave Closeness Rating Entry-Level (under $60) 6,000–8,000 1–2 1–2 Rarely Fair Mid-Range ($80–$150) 10,000–14,000 3 3–5 Most models Very Good Premium ($150–$350+) 14,000–20,000 4–5 5–8 Standard Excellent Table 3: Technical specifications and shave closeness by electric razor price tier. The sweet spot for most men seeking a close electric shave without overspending is the mid-range tier ($80–$150). These razors offer a significant performance upgrade over budget models — particularly in motor speed, multi-foil architecture, and pivot flexibility — at a fraction of the cost of flagship models. The premium tier is justified for professional grooming needs, very coarse beard types, or men who simply want the best available performance. Frequently Asked Questions About Getting the Closest Shave with an Electric Razor Q: Can an electric razor ever shave as close as a blade razor? Not quite — but the gap is very small with a premium foil razor. A manual blade physically contacts the skin surface; a foil razor maintains a thin foil barrier. In practical terms, most people cannot tell the difference visually after a good electric shave, but the skin may not feel quite as smooth to the touch against the grain. For everyday professional grooming, a premium electric razor is fully comparable to a blade for most men. Q: Does wet shaving with an electric razor really make a difference? Yes — significantly. Shaving with a compatible electric razor in the shower using shaving gel or foam softens the hair shaft and allows the blade to cut at a lower, closer point. Grooming professionals consistently rate wet electric shaving results as noticeably closer and smoother than dry shaving with the same razor. If your model is waterproof (IPX7 rated), always wet shave for the closest possible result. Q: How long does it take to adapt to an electric razor from a manual razor? Most men need 2 to 4 weeks to adapt. During this period, the skin and facial hair adjust to the different cutting action of an electric razor. Initial shaves may feel less close or cause mild irritation, but this improves progressively. Consistently shaving every 1–2 days rather than skipping days speeds up the adaptation process. After full adaptation, most men rate their electric shave closeness as equal to or exceeding their former manual razor results in practical, everyday terms. Q: Does shaving every day improve electric razor closeness? Yes. Daily electric shaving keeps hairs short enough that the foil can capture and cut them at maximum efficiency. Longer hairs (2–3 days' growth) are stiffer and less reliably captured by standard foil, leading to a less close result and more passes required. If a very close shave is a priority, daily shaving with an electric razor is strongly recommended over every-other-day or less frequent shaving. Q: Why does my electric razor not shave as close as it used to? The most common cause is worn blades and foils. Electric razor cutting components dull gradually over 12–18 months of daily use, and the performance decline is slow enough that many users don't notice until the difference becomes significant. Replacing the blade and foil cassette is usually all that is needed to fully restore shave closeness. Other causes include insufficient cleaning (clogged foils) and depleted battery performance affecting motor speed in cordless models. Q: Is a 5-blade foil razor better than a 3-blade for closeness? Not necessarily in a simple "more blades = closer" sense. What matters is the design and purpose of each foil zone. A well-engineered 3-foil system with dedicated long-hair, short-hair, and finishing foils often outperforms a basic 5-foil system where all foils perform the same function. Evaluate foil razors by the specialization of their cutting zones, not purely by the number of foil sections. Q: Is a rotary or foil razor better for the neck area? The neck is one of the most challenging areas because hair grows in multiple directions and the skin is loose and uneven. Rotary razors have a natural advantage here due to their independently pivoting heads and circular cutting motion, which can follow varied growth directions more intuitively. However, premium foil razors with advanced multi-axis pivot systems perform comparably on the neck for most men. If neck shaving closeness is your specific concern and your neck hair grows in many directions, a quality rotary razor is likely your better choice. Final Verdict: What Type of Electric Razor Gives the Closest Shave? For the vast majority of men, a premium foil electric razor used wet with shaving gel will deliver the closest electric shave possible — with results that rival a manual blade in everyday practical terms. The key features to prioritize are motor speed above 12,000 SPM, a multi-zone foil system with at least 3 specialized cutting elements, a multi-axis pivot mechanism, and IPX7 waterproof rating for wet use. If your beard is dense, curly, or grows heavily in multiple directions — particularly if you shave less frequently than every day — a high-quality rotary razor will serve you better for closeness and comfort. For everyone else, invest in a mid-range to premium foil shaver, commit to daily or near-daily shaving, use it wet with gel, replace blades on schedule, and clean it after every use. This combination will get you as close to a blade shave as any electric razor technology currently available can offer. The closest shave from an electric razor is not just about the razor — it is the sum of the right technology for your beard type, proper technique, and consistent maintenance working together.
VIEW FULL ARTICLE
KEEP IN TOUCH
-

luke@aisenappliance.com
-

+86-13819843737 / +86-574-62361977
-

Unit 1, Building 7, No. 4 Xieli Road, Simen Town, Yuyao City, Zhejiang Province, China