

 English
  日本語
日本語
 Español
 Deutsch



News Category:
Key Words:
-
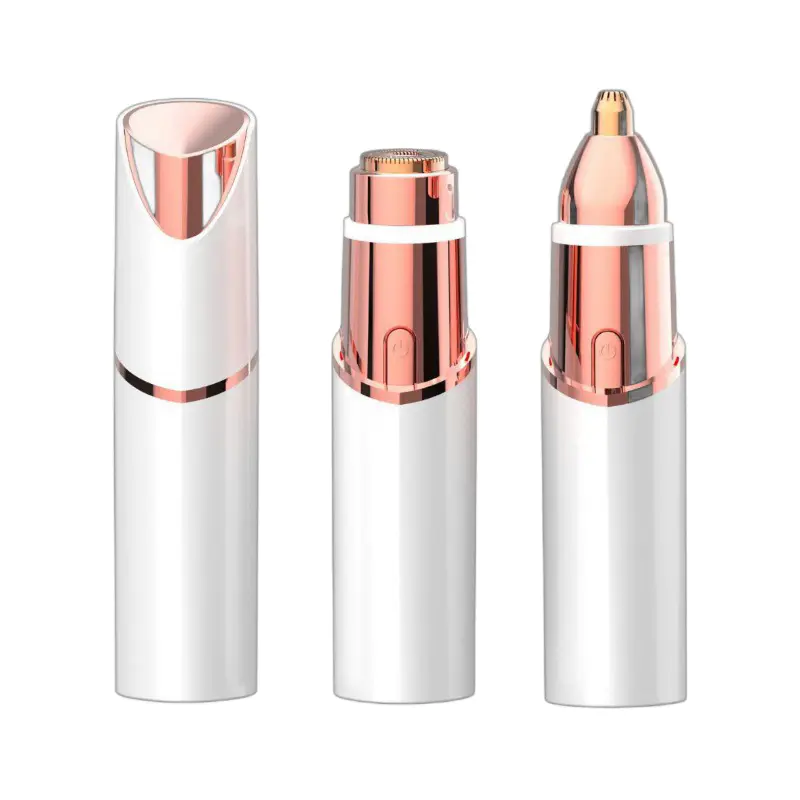 May 21,2026
How to Sharpen Electric Shaver Blades: A Complete Step-by-Step Guide
The most effective way to sharpen electric shaver blades at home is to use the aluminum foil method or a dedicated blade honing compound, which can restore up to 70% of the original cutting performance without replacing the shaving head. Whether you own a foil shaver or a rotary shaver, dull blades don't always mean it's time to buy replacements — with the right technique and a few minutes of effort, you can significantly extend blade life, save $20–$60 per replacement cycle, and enjoy a closer, more comfortable shave. This guide covers every method, comparison, and tip you need. Why Electric Shaver Blades Go Dull and When to Sharpen Them Electric shaver blades dull primarily due to microscopic metal fatigue, oxidation, and the accumulation of hardened skin protein and mineral deposits from water — not just mechanical wear. Most manufacturers recommend replacing shaving heads every 12–18 months, but with regular sharpening and proper maintenance, many users extend head life to 24–30 months without any noticeable drop in shave quality. The following signs indicate your electric shaver blades need sharpening rather than replacement: Tugging or pulling sensation: A sharp blade cuts hair cleanly; a dull blade bends the hair before cutting it, causing a pulling feeling on the skin. Redness and irritation after shaving: Dull blades require more passes over the skin, increasing friction and leading to razor burn or ingrown hairs. Longer shaving time: If a shave that used to take 3 minutes now takes 5–6 minutes, the blades are losing cutting efficiency. Patches of missed hair: Dull blades skip over stubble rather than cutting it, leaving uneven results especially on the neck and jaw line. Increased noise or vibration: A shaver working harder to compensate for dull blades often runs noticeably louder. If you experience two or more of these symptoms, attempt sharpening before spending money on a replacement head. In many cases, the blades simply need a quick honing rather than full replacement. Understanding Electric Shaver Blade Types Before You Sharpen The two main types of electric shaver blades — foil and rotary — require different sharpening approaches, so identifying your shaver type is the essential first step. Feature Foil Shaver Rotary Shaver Blade design Straight oscillating blades beneath a perforated metal foil Circular spinning blades under round guard heads Number of cutting units Typically 2–5 foil strips Typically 3 rotary heads Best sharpening method Aluminum foil lap method; honing paste Honing compound; diamond paste; self-lapping Ease of DIY sharpening Moderate Easy (self-lapping technique) Replacement cost (head only) $20–$60 $25–$55 Sharpening frequency recommended Every 6–8 months Every 4–6 months Table 1: Key differences between foil and rotary electric shaver blades, including design, sharpening method, and cost considerations. 4 Proven Methods to Sharpen Electric Shaver Blades at Home There are four reliable DIY methods to sharpen electric shaver blades, ranging from completely free household techniques to low-cost specialist compounds — each suited to different blade types and levels of dulling. Method 1 — The Aluminum Foil Lapping Method (Best for Foil Shavers) The aluminum foil method is the most widely used free technique for sharpening foil shaver blades and works by using the foil as a micro-abrasive lap surface to re-hone the blade edges. Ordinary kitchen aluminum foil has a surface roughness of approximately 0.2–0.5 microns — fine enough to polish and realign the micro-serrations on electric shaver blades without removing significant metal. What you need: A sheet of standard kitchen aluminum foil (heavy-duty works best) A flat, firm surface (cutting board or glass plate) Your electric shaver with the foil guard removed Step-by-step instructions: Clean the blades thoroughly first. Remove the shaving head and rinse the cutter block under warm running water. Use the cleaning brush that came with your shaver to remove all hair stubble and skin debris. Allow to dry completely before proceeding — moisture on the blade during lapping can cause uneven results. Lay a double-folded sheet of aluminum foil flat on a firm surface. Fold the foil in half once so you have a double layer — this gives it enough stiffness to work as a lapping surface without tearing. Turn the shaver on and move it across the foil in a straight back-and-forth motion. Apply light, consistent downward pressure. Move the shaver across the foil for 3–5 minutes using the same motion you would use when shaving. The foil acts as a fine abrasive that microscopically re-grinds and realigns the cutting edges. Rotate the shaver 90 degrees and repeat. Sharpening from two perpendicular directions ensures even honing across the full width of the blade. Clean the blade block again after sharpening. Remove all foil particles with the cleaning brush and a rinse under warm water. Apply a single drop of light mineral oil or clipper oil to the blade before reassembly to maintain edge quality. Reassemble and test. Run the shaver on your arm hair or perform a test shave. Most users notice an immediate improvement in cutting smoothness after just one session. Note: this method works best on the inner cutter blades. It does not sharpen the outer foil guard itself. If the foil guard has holes or tears, it must be replaced — no sharpening method can repair a damaged foil screen. Method 2 — The Self-Lapping Technique (Best for Rotary Shavers) The self-lapping technique uses a fine abrasive paste applied between the rotary blade and its guard head, allowing the shaver's own motor to hone both surfaces simultaneously as they rotate against each other. This method is uniquely well-suited to rotary shavers because the circular motion of the blade creates an even, consistent honing action around the full circumference of each cutting edge. What you need: Honing paste or valve grinding compound (fine grade, 400–600 grit equivalent) A small flat brush or cotton swab for application Warm water and cleaning brush for rinse-out Step-by-step instructions: Remove and clean each rotary head. Pop out each of the three rotary cutting units (blade + guard) and rinse them clean. Keep each blade with its matching guard — mixing them up will create uneven wear patterns as they have already lapped to fit each other. Apply a tiny amount of honing paste to the guard's inner cutting surface. A pea-sized amount per head is sufficient — too much paste will clog the cutting slots rather than sharpen the edge. Spread it evenly with a brush or cotton swab. Reassemble the heads and run the shaver for 60 seconds. The motor drives the blade against the paste-coated guard surface, creating a precision honing action. You will hear a slightly rougher sound than normal — this is expected. Disassemble and rinse all paste out completely. Use warm running water and the cleaning brush to flush every trace of abrasive from the heads. Any residual grit left in the shaver will act as a contaminant during use and cause accelerated wear. Apply one drop of lubricating oil per head and reassemble. Clipper oil or a specialist shaver lubricant protects the freshly honed edges and improves cutting performance immediately. Method 3 — Diamond Paste Honing (Best for Severely Dull Blades) Diamond lapping paste is the most aggressive DIY sharpening method and is reserved for blades that have become severely dull after extended use without any maintenance. Diamond paste uses synthetic diamond abrasive particles suspended in a water-soluble carrier — at 1,200–3,000 grit, it can restore a genuinely worn cutting edge where aluminum foil or standard honing compound would have little effect. A small 5g tube costs $4–$8 and lasts for dozens of sharpening sessions. The application process mirrors the self-lapping method above, but uses diamond paste in place of valve compound. Because diamond paste is considerably more abrasive, limit the running time to 30 seconds per session and rinse extremely thoroughly. Use this method no more than once every 12 months on any given shaving head to avoid over-grinding the blade geometry. Method 4 — Leather Strop Finishing (Best as a Regular Maintenance Step) Stropping the inner cutter blades on a piece of smooth leather is the fastest and gentlest sharpening method and works best as a monthly maintenance habit rather than a once-a-year rescue treatment. Leather stropping realigns and polishes the microscopic wire edge that forms on blades during use, without removing any significant metal — the same principle used on straight razors and kitchen knives. Lay a smooth piece of vegetable-tanned leather (a leather belt works well) on a flat surface. With the shaver running, draw the exposed cutter block across the leather in a slow, forward-only stroke 10–15 times. This takes under 2 minutes and, done monthly, can delay the need for any more intensive sharpening method by several additional months. Comparing All Four Electric Shaver Blade Sharpening Methods Choosing the right sharpening method depends on your shaver type, the severity of dulling, and how much time and money you want to invest — the table below lays out all four options side by side. Method Best Shaver Type Abrasiveness Time Required Cost Skill Level Use Frequency Aluminum Foil Foil shaver Very low 5–8 minutes Free Beginner Every 2–3 months Self-Lapping (Honing Paste) Rotary shaver Low–medium 10–15 minutes $3–$8 Beginner Every 4–6 months Diamond Paste Honing Both types High 5–10 minutes $4–$10 Intermediate Once per year max Leather Strop Both types Negligible 1–2 minutes Free (leather belt) Beginner Monthly Table 2: Side-by-side comparison of four DIY electric shaver blade sharpening methods, rated by shaver compatibility, abrasiveness, time, cost, and recommended frequency. Should You Sharpen or Replace Your Electric Shaver Blades? Sharpening is the right choice for blades that have dulled gradually from regular use; replacement is necessary when the blade or foil guard has physical damage, corrosion, or has been sharpened multiple times without lasting improvement. Condition Sharpen Replace Blade feels dull but has no visible damage Yes No Foil guard has holes, tears, or dents No Yes Blades show rust spots or corrosion No Yes Shaver is less than 12 months old and pulls Yes No Shaver is over 3 years old and has been sharpened 3+ times Unlikely to help Yes Rotary blade cutter teeth are chipped or broken No Yes Performance improved after previous sharpening Yes No Table 3: Decision guide to help determine whether to sharpen or replace electric shaver blades based on blade condition and shaver history. The Role of Cleaning and Lubrication in Electric Shaver Blade Performance Proper cleaning and regular lubrication can restore up to 40% of lost cutting performance on their own, and always precede and follow any sharpening session for best results. Many shavers that appear dull are actually clogged — microscopic hair fragments and skin cell buildup packed between blade teeth create friction that mimics the feel of a dull blade. Daily Cleaning Routine (2 Minutes) Tap the shaving head firmly against your palm 3–4 times after each shave to dislodge loose hair, then use the provided cleaning brush to sweep the blade block. For wet-and-dry shavers, a quick rinse under warm running water while the motor runs flushes hair and skin debris from between the blades. Weekly Deep Cleaning (5 Minutes) Disassemble the cutting head fully once a week and soak all metal parts in warm water mixed with a few drops of liquid soap for 2–3 minutes. Use the cleaning brush to scrub each component, then rinse thoroughly and allow to air dry completely before reassembly. Trapped moisture is the primary cause of premature blade oxidation — always ensure parts are fully dry. Lubrication After Every Clean Apply a single drop of light machine oil, clipper oil, or sewing machine oil to the blade surface before every reassembly. This creates a micro-thin protective film that reduces metal-on-metal friction, prevents oxidation, and can extend the interval between necessary sharpening sessions by up to 30%. Never use cooking oils, WD-40, or thick greases — these either go rancid, attract debris, or are too viscous to penetrate the blade gaps effectively. Common Mistakes to Avoid When Sharpening Electric Shaver Blades Most sharpening failures come from a handful of avoidable errors that damage the blade geometry or introduce contaminants into the cutting system. Mixing up rotary head components: Each rotary blade self-laps to its specific guard over time. Swapping blades between head positions creates mismatched tolerances that worsen cutting performance and increase noise. Always mark each head before disassembly or replace them as matched sets. Using sandpaper instead of proper abrasives: Standard sandpaper grits (80–220) are far too coarse for shaver blade honing and will grind away blade geometry rather than refining the edge. Only use aluminum foil (very fine grit equivalent) or dedicated lapping compounds. Sharpening a damaged foil: Running the shaver on aluminum foil with a torn or perforated outer foil guard will not sharpen the inner blades — it will only worsen the damage to the guard. Inspect the foil screen carefully before attempting any sharpening. Over-sharpening with aggressive abrasives: Diamond paste or valve compound used too frequently removes metal and eventually thins the blade to the point where it loses structural integrity. The rule of thumb: use aggressive compounds no more than once per year and light methods no more than once every 2–3 months. Skipping the post-sharpen rinse: Residual abrasive particles left on the blade act as contaminants during the next shave, rapidly dulling the freshly honed edge and potentially irritating skin. Always flush all abrasive residue completely. Sharpening without cleaning first: Hair debris and skin buildup between the blade teeth prevents the abrasive from making even contact with the cutting edge, resulting in uneven honing. Always deep-clean before sharpening. Frequently Asked Questions: How to Sharpen Electric Shaver Blades Can all electric shaver blades be sharpened, or only certain types? Both foil and rotary electric shaver blades can be sharpened using the appropriate method, but the outer foil guard on foil shavers cannot be sharpened and must be replaced if damaged. The inner cutter blades in both shaver types are made from hardened stainless steel and respond well to honing. The outer foil or guard, however, is a precision-perforated screen that guides hair into the blade — once its geometry is compromised by wear or damage, no sharpening technique will restore it. How many times can you sharpen electric shaver blades before replacing them? Most electric shaver blades can be sharpened 3–5 times using light methods (aluminum foil or leather strop) over their lifetime before replacement becomes necessary. Aggressive honing methods such as diamond paste should be used at most once per annual cycle. After 3 or more full sharpening cycles with no lasting performance improvement, the blade has lost sufficient metal that the cutting geometry can no longer be restored — at that point, replacement is the correct choice. Does the aluminum foil method actually work, or is it a myth? The aluminum foil method genuinely works for mildly dull foil shaver blades because kitchen foil's surface acts as an ultra-fine lapping medium that polishes and re-aligns the blade edge. It is not a myth — the science is sound. However, its effect is modest: it is best described as a light edge refinement rather than a full sharpening. Users with moderately or heavily dull blades will see limited improvement from foil alone and should use a honing paste for more substantial results. That said, as a free, zero-risk maintenance technique performed every 2–3 months, it measurably extends intervals between replacement head purchases. What is the best lubricant to use on electric shaver blades after sharpening? The best lubricants for electric shaver blades after sharpening are light mineral oil, clipper oil, or purpose-formulated shaver oil — all of which penetrate blade gaps and provide corrosion protection without attracting debris. A single drop per cutting head is the correct amount. Avoid olive oil or any vegetable-based oil (they oxidise and go rancid inside the blade housing within days), petroleum jelly (too thick), and spray lubricants containing solvents (they displace existing lubricant rather than adding to it). Many users find that a dedicated clipper blade oil — sold widely for hair clipper maintenance — is the most cost-effective and optimally viscous option for shaver blades. Is it worth sharpening electric shaver blades, or is it better to just replace them? For shavers under 18 months old with no physical damage to the guard, sharpening is almost always worth attempting before replacement — it costs little, takes under 15 minutes, and can fully restore shaving performance in most cases. Replacement heads typically cost $25–$60 and need to be replaced again every 12–18 months. Even if sharpening only extends head life by 6 months, that is $12–$30 saved per cycle, compounding over years of ownership. The financial and environmental case for sharpening is strong: it keeps functional metal components in use rather than sending them to landfill prematurely. Can I sharpen electric shaver blades with toothpaste? Toothpaste can function as a very mild abrasive lapping compound in a pinch, but it is far less effective than proper honing paste and carries a risk of leaving foaming residue inside the shaver mechanism. Most whitening toothpastes contain hydrated silica abrasive particles at roughly 1,500–2,000 grit — fine enough to produce a mild honing effect on metal surfaces. However, the high water content, surfactants, and flavoring agents make thorough rinsing much harder than with dedicated compounds, and any residue left behind can cause corrosion or irritate skin during shaving. Use toothpaste only as an emergency substitute, and rinse extremely thoroughly afterward. Quick Reference: How to Sharpen Electric Shaver Blades Identify your shaver type — foil or rotary — and choose the appropriate method. Clean thoroughly before sharpening: remove hair debris and rinse; dry completely. Foil shavers: use the aluminum foil lap method or leather strop for regular maintenance. Rotary shavers: use the self-lapping method with fine honing compound every 4–6 months. Severe dulling: apply diamond paste for one 30-second session, once per year maximum. Rinse all abrasive residue completely after every sharpening session. Lubricate with one drop of clipper or mineral oil per head after every clean and sharpen. Replace when the foil guard is damaged, blades are corroded, or 3+ sharpenings show no effect.
VIEW FULL ARTICLE -
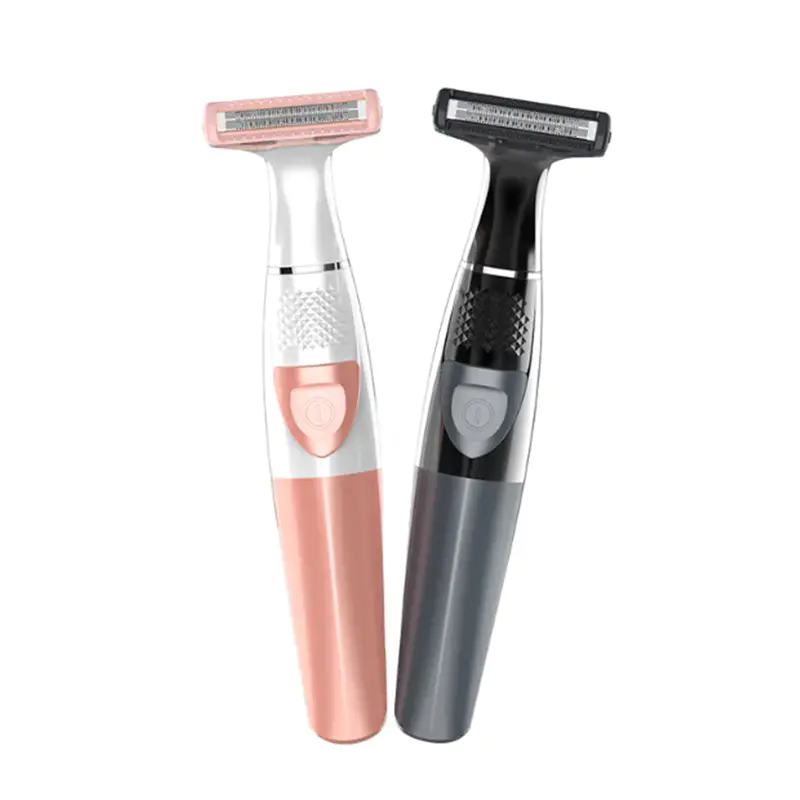 May 14,2026
How to Use an Electric Shaver for Ladies: A Complete Step-by-Step Guide for Smooth, Irritation-Free Results
To use an electric shaver for ladies correctly, follow this core sequence: charge the device fully before first use, cleanse and dry the skin area you plan to shave, hold the shaver at a slight angle against the skin, use short overlapping strokes moving against the direction of hair growth, rinse or clean the shaver head immediately after use, and apply a fragrance-free moisturizer to soothe the skin. Done properly, a ladies electric shaver delivers close, comfortable hair removal on legs, underarms, and the bikini area in under 5 minutes per zone -- with virtually no risk of cuts, nicks, or razor burn compared to manual blades. This guide walks through every step in detail, covers different body zones and their specific techniques, compares dry versus wet shaving, explains how to maintain your device for longevity, and answers the questions women most frequently ask about electric shavers. What to Do Before You Start: Preparing Your Skin and Shaver Proper preparation before using an electric shaver for ladies is the single most impactful step for achieving a close, comfortable result -- skin that is clean, dry, and free of body lotion allows the foil or rotary blades to make direct contact with hair at the optimal cutting angle. Step 1: Charge the Shaver Fully Before the very first use, charge your ladies electric shaver to 100% battery capacity -- this typically takes 60 to 90 minutes for most models. A fully charged battery delivers consistent motor speed throughout the shaving session, which directly translates to consistent cutting efficiency. A partially charged shaver runs the motor slower, requiring more passes over the same area and increasing friction on the skin. Most modern ladies electric shavers offer 30 to 50 minutes of cordless runtime from a full charge -- more than enough for a complete full-body shave. Step 2: Clean the Skin Thoroughly For dry shaving (the most common method for electric shavers), cleanse the skin area with a gentle cleanser and pat completely dry before shaving. Any residual body lotion, oil, or cream on the skin surface coats the foil or rotary cutting head, reducing its ability to lift and cut hair efficiently and causing clogging that requires frequent rinsing mid-session. For wet shaving (using the shaver in the shower or with shaving gel), the skin should be rinsed clean of any soap or conditioner before applying shaving gel. Step 3: Inspect the Shaver Head Before each use, quickly check the foil or rotary head for visible damage. A foil shaver's outer foil develops small holes over time (typically after 12 to 18 months of regular use) -- shaving with a damaged foil causes skin irritation because the sharp inner blade makes partial contact with the skin surface rather than cutting hair through the foil. If you see a hole or tear in the foil, replace the foil and blade cassette before using the device. How to Use an Electric Shaver on Your Legs: Step-by-Step Technique Shaving legs with a ladies electric shaver produces the best results when you use slow, deliberate upward strokes (against hair growth direction) while keeping the shaving head in constant, light contact with the skin without pressing down hard. Position and angle: Sit comfortably with the leg extended or propped on a stable surface. Hold the electric shaver so the cutting head lies flat against the skin -- most ladies shavers are designed to be used at 90 degrees (flat) to the skin surface rather than at an angle like a manual razor. Direction of stroke: Move the shaver upward (toward the knee when shaving the lower leg, toward the hip when shaving the thigh) -- this moves against the direction of hair growth, which is the most effective cutting direction for an electric shaver. Unlike a manual razor, which requires shaving in the direction of growth on sensitive skin, an electric shaver is specifically designed for against-the-grain use. Speed and pressure: Move the shaver slowly -- approximately 1 to 2 inches per second. Moving too quickly reduces the number of cutting passes over each hair and produces a less close result. Apply only the lightest touch -- the shaver's weight alone is sufficient pressure. Pressing harder does not improve closeness and increases skin irritation. Overlap strokes: Use slightly overlapping parallel strokes to ensure no strips of hair are missed between passes. Work systematically from ankle to knee, then knee to thigh, rather than shaving randomly across the leg surface. Skin tension: On areas where the skin is loose or wrinkled (back of the knee, inner thigh), use your free hand to gently stretch the skin taut before running the shaver over it. Taut skin allows the foil to sit flat and the blade to reach more hairs at the cutting level. Time estimate: A full leg shave with a ladies electric shaver takes approximately 3 to 6 minutes per leg when starting from several days of hair growth. Maintenance shaving (every 2 to 3 days) takes 1 to 2 minutes per leg. How to Use an Electric Shaver on Underarms Underarm shaving with a ladies electric shaver requires moving the shaver in multiple directions -- up, down, and sideways -- because underarm hair grows in several directions simultaneously, and a single-direction stroke misses a significant proportion of hairs. Preparation: Raise your arm fully and stretch it overhead or behind your head to create maximum skin tautness under the arm. For dry shaving, ensure the underarm area is completely dry and free of deodorant -- aluminum-based antiperspirants can clog the foil and reduce cutting efficiency significantly. Multi-directional technique: Begin with upward strokes, then repeat with downward strokes, then add horizontal strokes from each side. Three to four passes in different directions capture virtually all hairs regardless of their individual growth direction. The entire underarm area typically takes 30 to 60 seconds per side with this technique. After shaving: Wait at least 5 to 10 minutes before applying deodorant or antiperspirant to allow any minor skin sensitivity to subside. Apply a non-fragrant soothing lotion if redness is visible. Avoid perfumed products directly after shaving as the skin is temporarily more sensitive. How to Use an Electric Shaver on the Bikini Area The bikini area requires the gentlest technique of any body zone -- use the lowest speed setting if available, shorter strokes, and higher attention to skin tautness, because the skin in this area is thinner and more sensitive than legs or underarms. Check shaver compatibility: Not all ladies electric shavers include a bikini trimmer attachment -- confirm your model has a dedicated bikini head (usually a narrower trimmer guard or comb attachment) before attempting to shave this area. Using the standard foil head without a guard in the bikini area risks catching skin folds. Trim before shaving: If hair in the bikini area is longer than approximately 5mm (about 1/4 inch), use the trimmer comb attachment to reduce length before switching to the closer-cutting foil or rotary head. Long hair wraps around the cutting mechanism and causes pulling rather than clean cutting. Skin tautness is essential: Use your free hand to stretch the skin firmly before each stroke. This is more important in the bikini area than anywhere else on the body because loose, folded skin in this zone is the primary cause of both missed hairs and skin irritation. After care: Apply an unscented, alcohol-free soothing gel or aloe vera immediately after shaving the bikini area to calm any redness. Avoid tight synthetic clothing for several hours after shaving to minimize friction-induced irritation on freshly shaved skin. Dry Shaving vs. Wet Shaving with a Ladies Electric Shaver: Which Is Better? Dry shaving is faster, more convenient, and produces less skin irritation for most women in most situations; wet shaving with shaving gel or foam provides a closer, smoother result and is the better choice for sensitive skin types or for areas where maximum closeness is a priority. Comparison Factor Dry Shaving Wet Shaving (with gel or foam) Closeness of shave Good -- sufficient for most daily use Excellent -- noticeably smoother result Skin irritation risk Lower -- no product interaction Low if using correct gel; product choice matters Convenience Very high -- no products needed Moderate -- requires gel, rinsing, cleanup Shaver requirement Any ladies electric shaver Must be waterproof (IPX5 or higher rated) Time required Shorter -- no pre-wetting or drying Longer -- shower integration needed Shaver maintenance Simpler -- brush clean or tap out Requires thorough rinsing after every use Best for Daily maintenance shaving; quick touch-ups Sensitive skin; first shave of new growth Table 1: Comparison of dry shaving versus wet shaving with a ladies electric shaver across closeness, irritation risk, convenience, and maintenance requirements. Electric Shaver vs. Manual Razor vs. Epilator: Which Is Right for You? A ladies electric shaver is the best choice for women who prioritize speed, convenience, and zero risk of cuts -- but it produces a less close result than a manual razor and removes hair only at skin level rather than from the root like an epilator or wax. Factor Electric Shaver Manual Razor Epilator Waxing Hair removal level At skin surface At/slightly below surface From root From root Duration of smoothness 1--3 days 1--3 days 3--4 weeks 3--6 weeks Pain level None None (if careful) Moderate--High Moderate--High Risk of cuts or nicks Virtually zero Moderate (common) Low Low Upfront cost $20--$120 $5--$30 $30--$200 $20--$80 (salon varies) Ongoing cost Low (foil replacement $10--$30/yr) Moderate (blades $10--$40/yr) Very low High (salon) or moderate (at-home) Speed of use Very fast (3--6 min/leg) Moderate (5--10 min/leg) Slow (15--30 min/leg) Slow (salon appointment) Best for Quick, painless daily maintenance Maximum closeness; budget users Longer-lasting smooth skin Longest-lasting results Table 2: Side-by-side comparison of ladies electric shaver, manual razor, epilator, and waxing across eight key factors for body hair removal. How to Clean and Maintain Your Ladies Electric Shaver Cleaning your electric shaver after every single use is the most important maintenance habit for both hygiene and device longevity -- hair clippings left inside the cutting head attract moisture, cause blade corrosion, and reduce cutting efficiency within days of neglect. After Every Use Tap out loose clippings: Hold the shaver head downward and tap it gently against your palm or the side of the sink to dislodge loose hair clippings from inside the foil or rotary cutting area. Rinse under running water (if waterproof): For waterproof-rated shavers (IPX5 or higher), rinse the cutting head under warm running water for 10 to 15 seconds. This removes the majority of fine hair particles and skin cells from the blade and foil. Use the cleaning brush (for dry-only models): If your shaver is not rated for water cleaning, use the small cleaning brush provided to sweep out hair particles from inside the cutting head. Brush from inside outward to avoid pushing clippings deeper into the mechanism. Leave open to air dry: After rinsing, leave the cutting head cover open or removed to allow air circulation and complete drying before storage. Storing a wet shaver head in a closed case promotes mold and blade corrosion. Weekly Maintenance Deep clean with liquid soap: Once a week, apply a small drop of gentle liquid hand soap to the running cutting head, allow it to foam for 5 seconds, then rinse thoroughly under warm water. This removes the fine layer of skin oil and product residue that daily water rinsing leaves behind. Apply a drop of shaver oil: Place a single drop of specialized shaver oil or light mineral oil on the foil or rotary blades once a week. This lubricates the cutting mechanism, reduces friction on the foil, and significantly extends blade and foil life. Lubrication is especially important for titanium-coated foils that can develop micro-friction wear without it. When to Replace the Foil and Blade Most manufacturers recommend replacing the foil and inner blade cassette every 12 to 18 months of regular use (3 to 4 times per week). Signs that replacement is overdue include: the shaver requires multiple passes to cut the same hair; the shave feels rougher or more uncomfortable than it used to; you notice visible holes or thinning in the foil; or the device makes a noticeably different sound during operation. Replacement foil-and-blade sets typically cost $10 to $35 depending on the model. How to Avoid Skin Irritation When Using an Electric Shaver Skin irritation from an electric shaver is almost always preventable and is caused by one of four factors: a damaged or worn foil, pressing the device too hard against the skin, shaving over the same area too many times in one session, or applying irritating products immediately after shaving. Allow a break-in period: Skin that is accustomed to manual razor shaving may experience minor redness or sensitivity during the first 2 to 3 weeks of switching to an electric shaver. This is normal -- the skin adapts to the different mechanical action of the foil or rotary head within 3 to 4 weeks of regular use, after which irritation typically disappears entirely. Limit passes over each area: Do not shave the same strip of skin more than 2 to 3 times in a single session. Each additional pass over already-shaved skin increases friction on skin that has already had its protective lipid layer partially disturbed by shaving. Moisturize after shaving: Apply a fragrance-free, alcohol-free moisturizer to all shaved areas within 5 minutes of completing the shave. This replenishes the skin's moisture barrier before it dries out. Avoid products containing alcohol, heavy fragrance, or retinol immediately after shaving -- all of these can cause stinging and redness on freshly shaved skin. Shave in the evening: Shaving legs and the bikini area in the evening allows skin 8 to 10 hours to calm before potential friction from clothing and activity the next day. This is especially helpful during the break-in period. Replace foil on schedule: A worn foil that has developed micro-holes or thinning patches causes disproportionately more skin irritation than a new foil -- the damaged foil allows the sharp inner blade to make partial contact with the skin surface during cutting rather than keeping it protected. If irritation suddenly increases in a device that previously performed well, foil wear is the most likely cause. FAQ: How to Use an Electric Shaver for Ladies Q: Can I use a ladies electric shaver every day? A: Yes -- daily use of a ladies electric shaver is safe for most skin types because the foil mechanism never makes direct blade contact with the skin. Unlike manual razors, which remove a thin layer of skin cells with each pass, an electric shaver only contacts the foil against the skin and cuts hair through the foil openings. However, if your skin is prone to irritation, shaving every other day (every 2 days) gives the skin slightly more recovery time between sessions and is sufficient to maintain smooth skin for most women. Q: Should I shave with or against the direction of hair growth? A: For an electric shaver, shave against the direction of hair growth for the best result. This is the opposite of the common advice for manual razors on sensitive areas. The foil or rotary mechanism of an electric shaver is designed to lift hair upright before cutting -- this lifting action is most effective when the shaver moves against the grain, as it approaches hairs from the tip and stands them up into the foil openings. Moving with the grain flattens hairs against the skin and reduces the number of hairs the foil can capture in each pass. Q: Can I use a ladies electric shaver in the shower? A: Only if your specific shaver model is rated as waterproof -- look for an IPX5 or higher waterproof rating printed on the device or stated in the product specifications. An IPX5-rated shaver can handle being rinsed under running water and used with shaving gel in the shower. A shaver without a waterproof rating must never be used with water near the motor housing -- water ingress will permanently damage the motor and creates an electrical safety hazard. When in doubt, use the shaver dry outside the shower. Q: Why does my electric shaver not cut hair closely enough? The most common causes of a less-than-close shave with a ladies electric shaver are: (1) moving the device too quickly across the skin -- slow down to 1 to 2 inches per second; (2) a worn foil or blade cassette that needs replacement; (3) pressing too hard, which causes the foil to flex away from optimal contact; (4) insufficient charge causing the motor to run slower than designed; or (5) hair that is too long for direct foil shaving -- use the trimmer attachment first if hair exceeds about 5mm in length. Addressing these factors in order resolves the vast majority of closeness complaints. Q: Can I use a men's electric shaver for ladies' body shaving? A: Technically yes, but ladies electric shavers are specifically designed for body hair and skin and outperform men's face shavers in this role. Men's facial shavers are optimized for coarser, faster-growing facial stubble over small curved surface areas. Ladies shavers have longer, more flexible foil heads designed to follow the contours of larger curved surfaces (legs, underarms), often include trimmer attachments for the bikini area, and have ergonomic handles shaped for one-handed use without a mirror. Using a men's shaver on legs is not harmful but is typically less comfortable and less efficient due to the head geometry mismatch. Q: How long should a ladies electric shaver last? A good quality ladies electric shaver should last 3 to 7 years with proper care and regular foil and blade replacement. The motor and body of the device are designed for long service life; the consumable parts (foil, inner blade cassette, and rechargeable battery) have finite lifespans. Battery capacity in lithium-ion powered shavers typically diminishes noticeably after 300 to 500 charge cycles -- approximately 3 to 5 years of daily charging. When battery runtime drops significantly below original performance, the shaver can often be serviced with a battery replacement rather than replaced entirely, extending device life further. Quick-Reference Summary: How to Use an Electric Shaver for Ladies Follow these seven core steps every time you use your ladies electric shaver for consistently smooth, irritation-free results across all body zones. Step 1: Charge fully before use and inspect the foil for damage before every session. Step 2: Cleanse and completely dry the skin (or apply shaving gel for wet shaving on a waterproof model). Step 3: Hold the shaver flat against the skin with light pressure and move slowly -- 1 to 2 inches per second. Step 4: Shave against the direction of hair growth using short, overlapping strokes. For underarms, use multi-directional passes. Step 5: Use your free hand to stretch skin taut on loose or curved areas (back of knee, inner thigh, bikini area). Step 6: Clean the shaver immediately after every use -- rinse under water (waterproof models) or brush out clippings, and apply one drop of shaver oil weekly. Step 7: Apply a fragrance-free, alcohol-free moisturizer to all shaved areas within 5 minutes of finishing. Mastering how to use an electric shaver for ladies correctly takes just one or two practice sessions. Once the technique becomes routine, it delivers the fastest, safest, and most convenient hair removal option available -- saving both time and the ongoing cost of disposable blades, waxing appointments, or depilatory products year after year.
VIEW FULL ARTICLE -
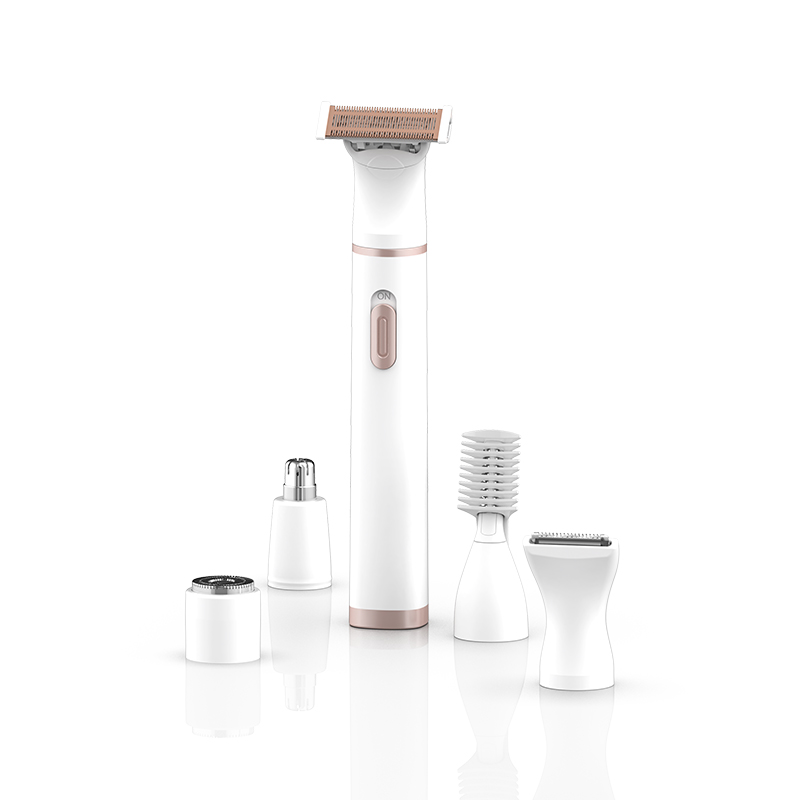 May 08,2026
How to Clean an Electric Shaver: A Complete Step-by-Step Guide for Foil and Rotary Models
To clean an electric shaver, tap out loose hair clippings after every use, rinse the shaving head under warm running water (if your model is waterproof), use the included cleaning brush to remove fine debris, and apply a drop of clipper oil to the blades every 1–2 weeks. A thorough deep clean — disassembling the head, washing all components, and lubricating — should be done at least once a month. Following this routine keeps blades sharp longer, prevents skin irritation, and extends the life of your shaver by 2–3 years compared to irregular maintenance. Neglecting to clean your electric shaver regularly leads to clogged blades, reduced cutting efficiency, bacterial buildup on the skin contact surface, and premature blade wear. A dirty shaver forces you to press harder against the skin — increasing the risk of razor burn, ingrown hairs, and irritation. This guide covers everything from daily quick-clean routines to monthly deep-clean procedures for both foil and rotary electric shavers. Why Cleaning Your Electric Shaver Regularly Matters Regular cleaning of your electric shaver directly affects shaving performance, skin health, and how long the device lasts — making it one of the most impactful maintenance habits you can build. Hair clippings, dead skin cells, shaving cream residue, and natural skin oils accumulate inside the shaving head after every single use. This buildup creates three compounding problems. First, clogged blades cut less efficiently. Tests conducted by grooming equipment researchers show that an uncleaned foil shaver loses up to 30% of its cutting efficiency within two weeks of daily use without cleaning. You end up going over the same area multiple times, which increases friction and skin irritation. Second, bacteria and fungi thrive in warm, hair-filled shaver heads. Staphylococcus aureus and other common skin bacteria can multiply rapidly in an uncleaned shaver, potentially causing folliculitis (infected hair follicles), acne flare-ups, or contact dermatitis — especially in people with sensitive skin. Third, blade wear accelerates without lubrication. Metal-on-metal friction between the foil and cutter block, or between rotary blades and their housing, causes microscopic wear with every shave. A single drop of lubricating oil applied regularly reduces this friction significantly and can extend blade life from a typical 12 months to 18–24 months. What You Need to Clean an Electric Shaver Cleaning an electric shaver requires only a few basic tools — most of which are either included with the shaver or cost under $5 to purchase separately. Having everything ready before you start makes the process faster and more effective. Cleaning brush: Most electric shavers include a small brush in the box. If yours is lost or worn out, any soft-bristle paintbrush or dedicated blade-cleaning brush works well. Warm running water: For waterproof shavers rated IPX5 or higher. Never use hot water — it can warp plastic components. Liquid hand soap or shaver-safe liquid soap: A tiny drop is sufficient for a full head wash. Avoid antibacterial soaps with harsh chemicals that can degrade rubber seals. Clipper oil or light mineral oil: Purpose-made clipper oil is ideal. A light sewing machine oil also works. Never use WD-40, cooking oil, or petroleum jelly. Isopropyl alcohol (70% concentration): Optional but useful for disinfecting the shaving head between full washes, especially when sharing the shaver or after skin breakouts. Clean microfiber cloth or paper towels: For drying components before reassembly. Small bowl or sink basin: Useful for soaking components during a deep clean. How to Clean a Foil Electric Shaver: Step by Step Foil electric shavers should be cleaned after every use with a quick brush-out, rinsed under water if waterproof, and deep-cleaned monthly by fully disassembling the head and washing each component. Foil shavers have a thin perforated metal screen (the foil) and an oscillating cutter block beneath it — both of which collect hair and debris. Daily Quick Clean (After Every Shave — 1 Minute) Turn off the shaver and unplug it from any charging cable before opening the head. Open or remove the shaver head by pressing the release button. On most foil shavers, the foil frame lifts off the top of the body. Tap the head gently against the palm of your hand or a tissue to dislodge loose hair clippings. Never tap it against the sink — this can bend the foil. Use the cleaning brush to sweep hair off the foil and the cutter block. Brush in one direction only — back and forth motion can push debris deeper into the mesh. Brush lightly; the foil is delicate and punctures easily. If your shaver is waterproof, hold the open head under warm running water for 10–15 seconds to flush out fine particles. Shake off excess water and leave it open to air-dry before closing. Reassemble only when all parts are dry to prevent moisture from being sealed inside the body. Monthly Deep Clean for Foil Shavers (10–15 Minutes) Fully disassemble the shaving head. Remove the foil frame, then carefully lift the cutter block out. Keep components from different head sections together — mixing foil and cutter block pairs from different positions reduces cutting efficiency. Brush all components thoroughly before introducing water. Dry brushing first removes the bulk of debris and makes the water rinse more effective. Rinse under warm running water for 20–30 seconds. Add a tiny drop of liquid soap and gently agitate the foil and cutter block under the stream. Do not scrub the foil — it is extremely thin (often less than 0.1mm) and can easily deform. Rinse thoroughly until no soap residue remains. Soap film left on blades attracts more debris and can cause skin irritation. Disinfect with isopropyl alcohol (optional): Spray or dab 70% isopropyl alcohol onto the foil and cutter block. Allow it to evaporate completely — this typically takes 1–2 minutes and leaves no residue. Dry all components completely. Pat gently with a clean cloth and then allow to air-dry for at least 30 minutes before reassembling. Residual moisture trapped inside can corrode internal components. Lubricate before reassembling. Apply one drop of clipper oil onto the foil mesh. Run the shaver for 10 seconds to distribute the oil across the blade surface. Wipe away any excess with a cloth. Reassemble carefully, ensuring each cutter block aligns with its original foil position. How to Clean a Rotary Electric Shaver: Step by Step Rotary electric shavers have a more complex head structure with multiple spinning blade discs and requires careful disassembly to clean each disc and its housing chamber individually. The rotating blades trap hair in the gaps between the disc and housing in a way that a simple rinse often cannot fully clear — making brush cleaning especially important. Daily Quick Clean — Rotary (1–2 Minutes) Turn off and unplug the shaver. Press the head release to detach the entire rotary head assembly from the shaver body. Tap the head gently against your palm to loosen cuttings trapped in the blade chambers. Use the cleaning brush to sweep around each rotary disc in a circular motion, matching the direction of blade rotation to avoid bending the cutting edges. Rinse under warm water if waterproof. The open head design of most rotary shavers allows water to flush through the chambers effectively. Run water through for 15–20 seconds. Shake and air-dry before reattaching to the body. Monthly Deep Clean — Rotary (15–20 Minutes) Remove the head assembly and then open the retaining ring to access individual blade discs. On most three-head rotary shavers, each disc lifts out individually. Label or photograph the orientation of each disc before removal — reinstalling them in the wrong position causes uneven shaving. Dry-brush each disc and housing chamber to remove accumulated hair before introducing water. Rinse each disc and the housing under warm running water with a small amount of liquid soap. Use the brush to clean inside each housing chamber — this area accumulates the most debris in rotary shavers. Rinse thoroughly and inspect each disc for bent or worn cutting edges. Worn edges appear dull and may have slight chips or uneven gaps. Disinfect with isopropyl alcohol and allow to evaporate fully. Dry completely — at least 30–60 minutes of air drying for rotary heads, which have deeper chambers that retain moisture longer than foil heads. Apply one drop of oil to the center spindle of each rotary disc. Reinstall discs in their original positions, run the shaver for 10 seconds to distribute oil, and wipe excess. Foil vs. Rotary Shaver Cleaning: Key Differences at a Glance The cleaning process for foil and rotary electric shavers differs in disassembly complexity, fragility of components, drying time, and the specific areas requiring the most attention. Understanding these differences prevents accidental damage during cleaning. Cleaning Factor Foil Electric Shaver Rotary Electric Shaver Daily clean time ~1 minute ~2 minutes Monthly deep clean time 10–15 minutes 15–20 minutes Most fragile component Foil mesh (punctures easily) Blade disc edges (can bend) Brushing direction One direction only Circular (follow blade rotation) Water rinse effectiveness Good — open mesh allows flow Moderate — chambers trap debris Drying time required 30 minutes 30–60 minutes Component orientation matters? Yes (foil-cutter pairs) Yes (disc position per head) Lubrication point Top of foil mesh Center spindle of each disc Table 1: Side-by-side comparison of cleaning procedures, component fragility, drying requirements, and lubrication points for foil vs. rotary electric shavers. How to Clean an Electric Shaver Without Water If your electric shaver is not waterproof, you must clean it using dry methods only — water exposure can permanently damage the motor, battery, and internal electronics. Check your shaver's IP (Ingress Protection) rating before introducing any water. A rating of IPX5 or higher indicates the shaver can handle water rinsing; IPX4 means splash-resistant only; no IP rating means keep it dry. Dry Cleaning Method (For Non-Waterproof Shavers) Turn off the shaver and remove it from any power source. Open the shaving head and tap out loose cuttings carefully. Brush all components thoroughly with the cleaning brush. Spend extra time on the cutter block and the inside of the head housing where debris collects in corners. Use a can of compressed air (available at electronics stores) to blast out fine hair particles from hard-to-reach areas. Hold the can upright and use short bursts to avoid moisture from propellant reaching the blades. Disinfect with a dry alcohol wipe or a cloth lightly dampened with isopropyl alcohol. Wipe the foil or rotary discs and allow to evaporate completely before closing. Lubricate with one drop of clipper oil applied to the blade surface. Run the shaver for 10 seconds to distribute, then wipe the excess. Recommended Electric Shaver Cleaning Schedule Establishing a consistent cleaning schedule — rather than cleaning only when performance visibly drops — is the single most effective maintenance habit for prolonging electric shaver life and shave quality. Frequency Task Time Required Tools Needed After every shave Tap out hair, brush head, rinse if waterproof 1–2 min Brush, water Every 1–2 weeks Lubricate blades with clipper oil 2 min Clipper oil Once a month Full disassembly, wash, disinfect, dry, lubricate 15–20 min Brush, soap, water, alcohol, oil, cloth Every 12–18 months Replace foil and cutter block (foil) or rotary discs 5 min Replacement blades/foils As needed Disinfect with isopropyl alcohol (after illness or skin breakouts) 2–3 min 70% isopropyl alcohol Table 2: Recommended maintenance schedule for cleaning an electric shaver, including task descriptions, time requirements, and tools needed at each interval. Common Mistakes to Avoid When Cleaning an Electric Shaver The most damaging mistakes when cleaning an electric shaver are using water on a non-waterproof model, scrubbing the foil too aggressively, and reassembling components before they are fully dry. Each of these errors can permanently damage the shaver or shorten its lifespan significantly. Tapping the head on the sink edge: This is one of the most common ways to dent or puncture a foil. Always tap against your palm or a soft surface. Using hot water: Hot water can warp the plastic housing, loosen adhesives, and cause rubber seals to degrade faster. Always use lukewarm or room-temperature water. Scrubbing the foil with a stiff brush: The foil on most shavers is thinner than a human hair. A stiff brush can push through the mesh and destroy it. Use only a soft-bristle brush with very light pressure. Mixing up foil and cutter block pairs: Each foil wears against its specific cutter block over time, creating a matched pair. Swapping them causes a sharp increase in friction and noise and dramatically reduces cut quality. Reassembling while wet: Even small amounts of residual moisture sealed inside the shaver body can corrode metal contacts and degrade motor components. Always allow 30–60 minutes of air drying. Over-lubricating: More oil is not better. Excess lubricant attracts fine hair particles and debris, creating a paste that clogs the blade faster. One drop per cleaning session is sufficient. Using cooking oil, WD-40, or baby oil: These either gum up blades, cause rubber degradation, or leave residues that transfer to skin. Only use purpose-made clipper oil or light mineral oil. Skipping cleaning because the shaver looks clean: Fine hair dust and skin cell residue are not always visible but accumulate rapidly. A shaver that looks clean on the outside can still have significant debris packed into the blade mechanism. Frequently Asked Questions About Cleaning Electric Shavers Q: How often should I clean my electric shaver? You should do a basic clean — tapping out debris and brushing the head — after every single shave, and a full deep clean with disassembly and washing at least once a month. If you shave daily, consider doing a quick rinse under water (if waterproof) every use. The 5 seconds it takes to tap out and brush your shaver adds years to its service life. Q: Can I use soap to clean my electric shaver? Yes — a small amount of mild liquid hand soap or dish soap is safe and effective for washing waterproof electric shaver heads. Use only a drop — you do not need more. Rinse very thoroughly afterward to remove all soap residue, which can irritate skin and attract debris if left on blades. Avoid antibacterial soaps, soaps containing moisturizers, or any soap with abrasive particles. Q: Can I use rubbing alcohol to clean my electric shaver? Yes — 70% isopropyl alcohol is safe and effective for disinfecting electric shaver blades and kills the vast majority of common skin bacteria within 30 seconds of contact. Apply with a cotton ball, dropper, or spray bottle. Allow it to evaporate completely before using or reassembling the shaver — this typically takes 1–2 minutes. Do not use alcohol concentrations above 90% regularly, as very high-concentration alcohol can degrade some plastic and rubber components over time. Q: My electric shaver is pulling and tugging after cleaning — why? Pulling and tugging after cleaning is almost always caused by reassembling the foil and cutter block in the wrong pairing, or by a foil that is worn out and needs replacement. First, verify that each cutter block is reinstalled beneath its original foil. If they are correctly paired and tugging persists, inspect the foil for visible wear or any dents and dimples — this is a sign the foil has reached end of life and needs replacement. Most foils should be replaced every 12–18 months with regular daily use. Q: Do automatic cleaning stations replace manual cleaning? Automatic cleaning and charging stations are convenient and do a good job of daily maintenance, but they do not fully replace periodic manual deep cleaning. These stations circulate a cleaning fluid through the shaving head, which removes most hair debris and lubricates blades automatically. However, they do not disassemble the head to clean inside housing chambers or inspect for blade wear. Manual deep cleaning every 2–3 months is still recommended even when using an automatic cleaning station. Q: How do I know when to replace blades instead of just cleaning them? Replace your electric shaver's blades or foil when cleaning no longer restores smooth, comfortable shaving performance — typically every 12–18 months with daily use. Specific signs that blades need replacement rather than cleaning include: persistent skin irritation even on freshly cleaned blades, visible dents or holes in the foil, a noticeable increase in motor noise as the shaver works harder to cut, and needing multiple passes over the same area to achieve a close shave. Most manufacturers recommend annual blade replacement for daily users. Q: Is it safe to clean an electric shaver while it is plugged in? No — always unplug your electric shaver from its charger and power source before beginning any cleaning procedure. Even waterproof shavers rated for shower use should be cleaned unplugged. The waterproofing of these models protects the internal components during use in water, but opening the head while plugged in still presents an electrical safety risk. The only exception is when running the shaver briefly to distribute lubricating oil after cleaning — this can be done cordlessly on battery power. Final Summary: How to Clean an Electric Shaver the Right Way Cleaning your electric shaver properly comes down to consistency, using the right tools, and understanding that different shaver types require slightly different approaches. The habits that make the biggest difference are simple: brush after every use, rinse if waterproof, lubricate every 1–2 weeks, and commit to a monthly deep clean with full disassembly. Whether you use a foil electric shaver or a rotary electric shaver, the principles are the same — remove debris before it builds up, keep blades lubricated, dry completely before reassembly, and replace blades on schedule rather than waiting for visible failure. A shaver maintained this way will deliver consistent, comfortable shaves for years and protect your skin from the irritation and bacterial risks that come with a neglected blade. The entire routine — daily quick clean plus monthly deep clean — takes fewer than 20 minutes per month. That investment pays back in sharper blades, smoother shaves, healthier skin, and a shaver that performs like new well beyond its expected service window.
VIEW FULL ARTICLE -
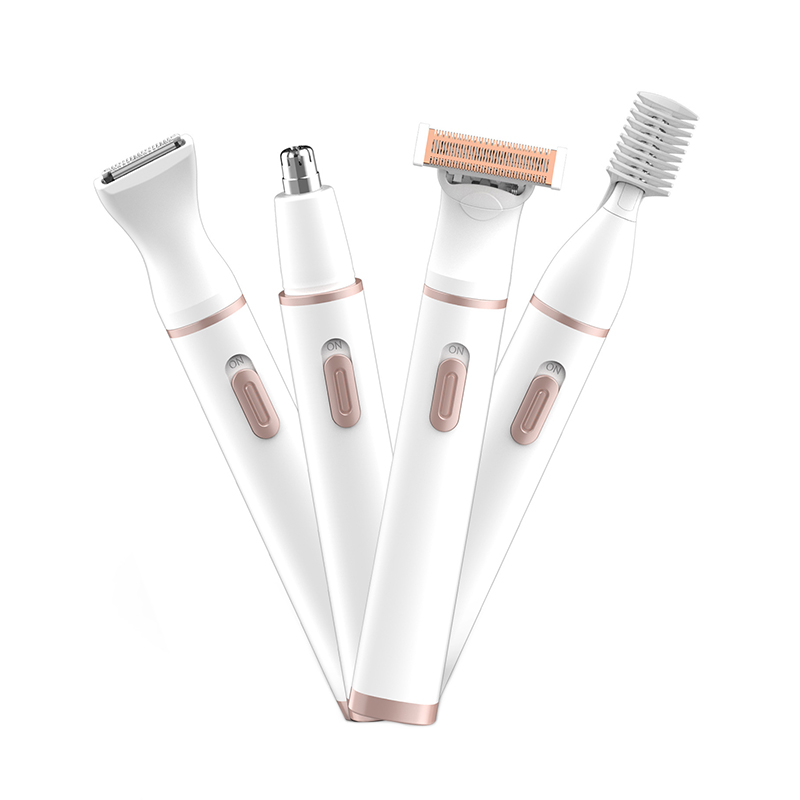 May 01,2026
Can You Use an Electric Shaver with Shaving Cream? The Complete Answer
You can use an electric shaver with shaving cream, but only if your shaver is explicitly rated as "wet/dry" or waterproof. Using shaving cream with a dry-only electric shaver can permanently damage the motor, corrode internal components, and void your warranty. For wet/dry shavers, applying shaving cream or gel can actually improve comfort, reduce skin irritation, and deliver a closer shave — especially for men with sensitive skin or coarse facial hair. This guide covers everything you need to know: how to tell if your shaver supports wet shaving, how shaving cream changes the shaving experience, the right technique for using both together, and when it makes more sense to shave dry. Whether you are switching from a traditional razor or simply curious about getting more out of your electric shaver, the answers below are practical and specific. Wet vs. Dry Electric Shavers — What Is the Difference? The single most important factor in whether you can use shaving cream with your electric shaver is whether it is classified as a wet/dry model or a dry-only model. These two categories are fundamentally different in their internal sealing, motor protection, and blade design. Dry-Only Electric Shavers Dry-only shavers are designed exclusively for use on bare, dry skin — no water, no foam, no gel, no lotion. Their internal components — motor, circuit board, battery contacts — are not sealed against moisture. Even a small amount of liquid entering through the blade head can cause immediate short-circuits or gradual corrosion that destroys the shaver over weeks. Dry-only shavers are typically lower in price and designed for convenience — a quick shave at the desk or on the road without any prep. They are identifiable by the absence of any waterproof or IPX rating on the packaging or product specifications. Wet/Dry Electric Shavers Wet/dry electric shavers are fully sealed units with waterproof ratings (most commonly IPX5 or IPX7) that allow use in the shower, under running water, and with shaving cream, gel, foam, or oil. IPX5 means the shaver is protected against water jets from any direction; IPX7 means it can be submerged in up to 1 meter of water for 30 minutes. Wet/dry shavers are specifically engineered with hydrophilic blades — blades treated or designed to glide smoothly when wet — and sealed charging contacts to prevent water ingress during rinsing and cleaning. These models are universally safe for use with shaving cream. How to check your shaver's rating: Look on the shaver body, in the user manual, or on the manufacturer's product page. Any of the following phrases confirms wet shaving compatibility: "wet & dry," "IPX5," "IPX7," "waterproof," or "suitable for shower use." Wet/Dry vs. Dry-Only Electric Shavers — Side-by-Side Comparison Understanding what each type can and cannot do helps you make the right choice for your shaving routine. Feature Wet/Dry Shaver Dry-Only Shaver Use with shaving cream Yes No Use in shower Yes No Rinse under running water Yes No Waterproof rating IPX5 / IPX7 None Skin comfort (sensitive skin) Higher (with cream) Lower Typical price range Moderate to High Low to Moderate Ease of cleaning Easy (rinse under tap) Brush-only cleaning Best for Sensitive skin, close shave Quick dry shave, travel Table: A full comparison of wet/dry and dry-only electric shavers across compatibility, comfort, cleaning, and typical use cases. What Does Shaving Cream Actually Do for an Electric Shaver? Shaving cream acts as a lubricating barrier between the shaver's blades and your skin, reducing friction, lifting facial hair, and preventing razor burn — benefits that are just as relevant for electric shavers as they are for traditional razors. When you apply shaving cream or gel before using a wet/dry electric shaver, three things happen simultaneously: Hair softening: The water content in the cream hydrates and swells each hair shaft by up to 30–40%, making it significantly easier to cut cleanly and with less motor strain. Lubrication: The cream creates a slippery film over the skin surface, allowing the shaver head to glide smoothly rather than dragging — particularly important in the jaw, chin, and neck area where skin can fold. Skin protection: The cream cushions each pass of the shaver head, reducing micro-abrasion that causes redness, bumps, and irritation — a major concern for men with sensitive or acne-prone skin. Studies in dermatology journals have consistently shown that shaving with a lubricating agent reduces skin barrier disruption by 20–35% compared to dry shaving, regardless of whether the cutting tool is a blade or an electric shaver. This translates directly to fewer ingrown hairs, less post-shave redness, and lower likelihood of razor bumps — technically called pseudofolliculitis barbae. For men who shave daily, this cumulative reduction in skin trauma is clinically significant. Even if the difference feels minor on any given morning, the long-term impact on skin health is meaningful. How to Use an Electric Shaver with Shaving Cream — Step by Step The technique for wet electric shaving differs from both dry electric shaving and traditional razor shaving — following the correct steps ensures a closer, more comfortable result and extends the life of your shaver. Confirm your shaver is wet/dry rated. Check for IPX5, IPX7, or a "wet & dry" label before applying any product. If in doubt, check the manual. Wash your face with warm water. Spend at least 30 seconds wetting your face with warm — not hot — water. Warm water opens pores, softens hair, and prepares skin to absorb the cream more effectively. Shaving immediately after a shower is ideal. Apply a thin, even layer of shaving cream or gel. Use a pea-to-marble-sized amount — much less than you would use with a blade razor. Electric shavers work best with a thin lubricating layer, not a thick foam build-up. Excess foam can clog the shaver head and reduce cutting efficiency. Massage gently into the skin in circular motions. Shave with light, slow strokes. Unlike dry electric shaving, wet shaving requires slower, more deliberate passes. Move the shaver against the direction of hair growth for a closer result, or with the grain if you have sensitive skin. Use your free hand to gently stretch the skin flat on problem areas like the neck and jaw. Rinse the shaver head periodically. Every 60–90 seconds, briefly rinse the shaver head under running water to clear accumulated cream and cut hairs. This prevents clogging and maintains consistent blade contact with the skin. Rinse your face thoroughly with cool water. After shaving, rinse your face with cool water to close pores and remove all cream residue. Pat dry with a clean towel — do not rub. Clean the shaver fully after use. Rinse the shaver head under running water until the water runs clear. Many wet/dry shavers can also be cleaned by opening the head and rinsing under a direct tap. Allow to air dry completely before storing or charging. Apply a post-shave moisturizer or balm. Wet shaving, even with cream, removes some of the skin's natural moisture barrier. A fragrance-free balm or moisturizer applied within two minutes of shaving restores hydration and significantly reduces post-shave tightness or redness. Which Type of Shaving Product Works Best with an Electric Shaver? Transparent shaving gels and non-foaming shaving creams work best with electric shavers — thick aerosol foams and heavy lather creams tend to clog the blade assembly and reduce cutting performance. Here is how the main types of shaving products compare when used with an electric shaver: Product Type Compatibility Lubrication Clog Risk Best For Shaving gel (clear) Excellent High Low All skin types Non-foaming cream Excellent High Low Sensitive skin Aerosol foam Fair Moderate Medium–High Thick, coarse hair Shaving oil Good Very High Low Dry/very sensitive skin Soap lather (brush) Poor Moderate High Not recommended No product (dry) N/A None None Quick touch-ups Table: Comparison of different shaving products and their compatibility, lubrication quality, clogging risk, and ideal use cases when paired with a wet/dry electric shaver. Wet Shaving vs. Dry Shaving with an Electric Shaver — Which Is Better? Wet shaving with cream delivers greater comfort and closeness for most men, while dry shaving offers unbeatable convenience — the right choice depends on your skin type, time available, and shave quality expectations. There is no universal winner. Professional grooming experts and dermatologists generally agree on the following breakdown: When Wet Shaving with Cream Is the Better Choice Sensitive or easily irritated skin — the cream barrier dramatically reduces friction-related redness Coarse or dense facial hair — softened hair is easier to cut, reducing pulling and tugging Daily shavers — frequent shaving accumulates skin stress; cream helps manage it Men prone to ingrown hairs or razor bumps — lubrication reduces the sharp-angled cutting that contributes to ingrowns Longer, uneven stubble — cream helps the shaver maintain consistent contact with the skin surface When Dry Shaving Is the Better Choice Time-constrained mornings — dry shaving takes 2–3 minutes versus 6–8 minutes for a full wet shave Travel without access to running water — dry shavers work anywhere, any time Normal or oily skin with fine hair — may not experience enough benefit from cream to justify the extra time Touch-up shaves between main sessions — quick dry passes are efficient for maintaining an already-close shave Men who prefer a slightly longer stubble look — dry shaving tends to leave a fractionally longer result, which suits certain styles Foil vs. Rotary Electric Shavers — Which Works Better with Shaving Cream? Both foil and rotary electric shavers can be used with shaving cream when rated as wet/dry, but foil shavers generally perform slightly better with cream due to their blade geometry and rinsing ease. Foil Shavers with Shaving Cream Foil shavers use oscillating blades beneath a thin perforated metal screen. The straight, linear cutting motion pairs naturally with a thin layer of shaving gel because the cream fills and protects the skin while the foil screen lifts hairs into the cutting element. Foil shavers also tend to be easier to rinse clean of cream residue under running water due to their open-sided blade cassette design. Foil shavers work especially well on flat areas of the face — the cheeks and upper lip — and deliver a very close, smooth result when used with gel on well-prepared skin. Rotary Shavers with Shaving Cream Rotary shavers use three or four circular blade heads that spin continuously. They excel at following facial contours — the jaw, chin, and neck — making them a popular choice for men with rounded or angular face shapes. When used with shaving cream, they perform well, though cream can accumulate more readily in the circular blade channels, requiring more frequent mid-shave rinsing. Using a thinner, less viscous shaving gel (rather than a thick foam) with a rotary shaver reduces clogging and makes the cleaning process significantly easier. Common Mistakes When Using an Electric Shaver with Shaving Cream Most problems with wet electric shaving come from applying too much product, using the wrong type of cream, or failing to rinse the shaver properly — all of which are easily avoidable. Using too much cream: A thick foam layer prevents the shaver's blades from reaching the hair effectively. Use only a thin, even film — enough to see the skin beneath if pressed lightly. Moving the shaver too quickly: Wet shaving requires slower strokes than dry shaving. Rushing causes the shaver to hydroplane over the cream rather than cutting the hair cleanly. Not rinsing mid-shave: Accumulated cream mixed with cut hairs forms a paste that dramatically reduces blade efficiency. Rinse the head every 60–90 seconds. Using alcohol-based aftershave immediately after: Wet shaving opens pores and micro-abrades the skin. Applying alcohol-based products immediately after can cause severe stinging and irritation. Use a soothing, alcohol-free balm instead. Storing the shaver wet: Always allow the shaver to air dry completely after a wet shave before capping or storing it. Trapping moisture inside the blade assembly accelerates oxidation of the blades even on sealed shavers. Skipping blade lubrication: Wet shaving washes away the factory lubrication on blades faster than dry use. Apply a single drop of specialized blade oil to the shaver head every 2–3 wet shaves to maintain blade sharpness and prolong service life. Frequently Asked Questions Q: Will using shaving cream damage my electric shaver? Not if your shaver is rated wet/dry. On a properly sealed wet/dry shaver, shaving cream causes no damage whatsoever. The only risk is with dry-only shavers, where any moisture — including cream — can corrode internal electronics and void the warranty. Q: Can I use shaving cream with an electric shaver in the shower? Yes — if your shaver has an IPX5 or IPX7 waterproof rating. Shower shaving with cream is an excellent combination: the steam softens hair, the warm water opens pores, and the cream provides lubrication. Many wet/dry shaver users report this is their preferred method. Never use a non-waterproof shaver in a steamy environment even without cream. Q: Does shaving cream make an electric shaver give a closer shave? For most men, yes. Shaving cream softens the hair shaft, making it easier for the blades to cut closer to the skin. Tests comparing wet versus dry electric shaving on the same individuals typically show that wet shaving with cream results in a shave that lasts 20–30% longer before stubble becomes visible, due to the marginally closer cut achieved with softened hair. Q: Can I use shaving gel instead of shaving cream with my electric shaver? Yes — and shaving gel is often the better choice for electric shavers. Clear, non-foaming gels provide excellent lubrication, apply in a thin layer that doesn't clog blade heads, and rinse away cleanly. Avoid thick, dense aerosol gels that expand significantly on contact with skin; these behave more like foam and carry a higher clog risk. Q: How do I clean my electric shaver after using it with cream? Rinse the shaver head under warm running water immediately after shaving, before the cream dries and hardens. Open the blade cassette if possible and rinse each component individually. For rotary shavers, detach each circular blade head and rinse separately. After rinsing, shake off excess water, leave the head open, and allow to air dry for at least 30 minutes before reassembling or charging. Q: Does using cream wear out electric shaver blades faster? Wet shaving can slightly accelerate blade oxidation if the shaver is not dried thoroughly after each use. However, the reduced friction from cream means the blades are under less mechanical strain per pass. The net effect on blade longevity is roughly neutral — provided you dry the shaver properly and apply blade oil every few wet shaves. Blades that are regularly used wet and not dried tend to develop surface rust within 6–12 months. Q: Is it better to use shaving cream with an electric shaver or just water? Both are valid options for wet/dry shavers, but shaving cream or gel offers meaningfully more lubrication and skin protection than water alone. Water softens the hair but provides no glide for the shaver head over the skin. If you are shaving in the shower and want minimal prep, water alone is acceptable; for any dedicated shave session — especially for sensitive skin — a thin layer of gel or cream makes a noticeable difference in comfort and result. Final Verdict: Should You Use Shaving Cream with Your Electric Shaver? If your electric shaver is rated wet/dry, using shaving cream or gel is not just safe — it is one of the most effective upgrades you can make to your shaving routine, particularly for sensitive skin, coarse hair, or daily shaving. The combination of a quality wet/dry electric shaver with a thin layer of clear shaving gel delivers the convenience of electric shaving with a level of comfort and closeness that approaches — and in some cases exceeds — a traditional blade razor, without the risk of cuts or the need to replace disposable blades. If you currently own a dry-only electric shaver and are experiencing skin irritation or an uncomfortably rough shave, the most impactful investment you can make is upgrading to a wet/dry model that allows cream use. The difference in skin feel after the first wet shave is, for most men, immediately and dramatically noticeable. The bottom line: check your shaver's waterproof rating, choose a non-foaming gel or cream, apply a thin layer, shave slowly, and rinse thoroughly. That four-step adjustment to your existing routine is all it takes to transform an average electric shave into an exceptional one.
VIEW FULL ARTICLE -
 Apr 23,2026
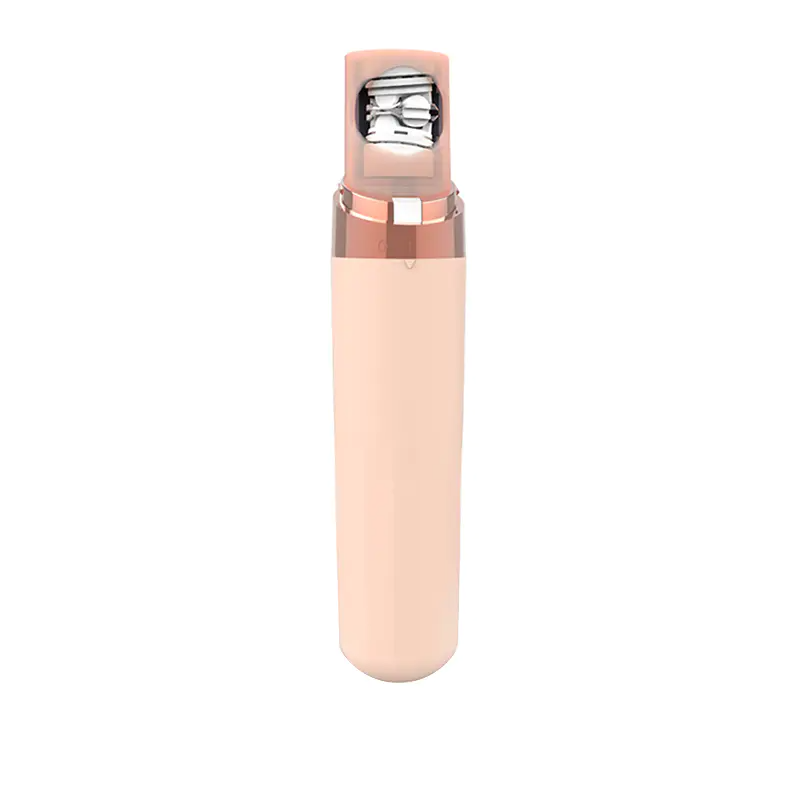
Can You Bring an Electric Shaver on a Plane? Everything Travelers Need to Know
You can bring an electric shaver on a plane — in both your carry-on bag and your checked luggage — and it is one of the most travel-friendly grooming tools you can pack. Unlike straight razors or razor blades, electric shavers contain no exposed blades and are explicitly permitted by the Transportation Security Administration (TSA) in the United States and by equivalent aviation security agencies worldwide. However, if your electric shaver is cordless and powered by a lithium-ion battery, specific airline and aviation authority rules apply that every traveler should understand before heading to the airport. This guide covers everything from TSA regulations and battery rules to packing strategies and international travel considerations. What the TSA Says About Electric Shavers on Planes The TSA explicitly permits electric shavers in both carry-on and checked bags with no quantity restrictions, making them one of the least complicated grooming items to travel with. According to the TSA's official "What Can I Bring?" database, electric razors and shavers are listed as allowed items in both baggage categories without any special conditions related to the shaver itself. This is a meaningful distinction from other types of razors. Straight razors — which have an exposed, non-retractable blade — are prohibited in carry-on bags but allowed in checked luggage. Safety razors with removable blades follow the same rule: the razor body is allowed in carry-on, but loose blades are not. Disposable razors with permanently enclosed blade cartridges are allowed in carry-on bags. And electric shavers are allowed everywhere, with the battery caveat explained below. The reason electric shavers receive such permissive treatment is straightforward: the cutting elements — oscillating foils or rotary blades — are fully enclosed within the shaver housing and cannot be used as a weapon. Security screeners do not need to inspect or remove your electric shaver from your bag during a standard TSA screening, though they retain the right to examine any item that triggers an alert. The Lithium Battery Rule: The One Exception That Matters The only meaningful restriction on traveling with an electric shaver relates not to the shaver itself, but to its lithium-ion or lithium-polymer battery — and this rule applies to virtually all modern cordless electric shavers. The Federal Aviation Administration (FAA) and the International Air Transport Association (IATA) restrict lithium batteries in checked baggage because of the risk of thermal runaway — a condition in which a damaged or defective lithium battery enters an uncontrollable self-heating cycle that can cause fire. In the cargo hold, such a fire may go undetected long enough to become catastrophic. In the cabin, crew can respond immediately. The specific rules are as follows: Shavers with non-removable lithium batteries (built-in): Must be carried in carry-on baggage only. They are not permitted in checked luggage because if the battery malfunctions in the cargo hold, there is no way for crew to intervene. This rule applies to the majority of modern cordless electric shavers, which have sealed rechargeable batteries. Shavers with removable lithium batteries: The device body can go in either bag, but the spare batteries must travel in carry-on baggage, not checked bags. Batteries already installed in the device follow the same rule as non-removable batteries. Shavers powered by standard AA or AAA alkaline batteries: No lithium battery restrictions apply. These shavers can go in either carry-on or checked baggage without restriction. Corded electric shavers (no battery): Fully unrestricted. These can travel in carry-on or checked baggage without any limitation beyond normal size and weight rules. The battery capacity limit for consumer devices is 100 watt-hours (Wh) per battery for carry-on without airline approval. The battery in a typical cordless electric shaver is far below this threshold — most shaver batteries are in the range of 2–5 Wh — so capacity is virtually never an issue for electric shavers in practice. Carry-On vs. Checked Bag: Which Is Better for Your Electric Shaver? For any modern cordless electric shaver with a built-in lithium battery, carry-on baggage is not just recommended — it is the only compliant option under FAA and IATA regulations. Here is a full comparison of the two options across all shaver types: Shaver Type Carry-On Allowed? Checked Bag Allowed? Notes Cordless (built-in Li-ion battery) Yes No Most modern shavers fall in this category Cordless (removable Li-ion battery) Yes Body only (remove battery) Spare batteries must stay in carry-on Battery-powered (AA/AAA alkaline) Yes Yes No lithium restrictions apply Corded electric shaver (no battery) Yes Yes Fully unrestricted; check voltage compatibility Table 1: Summary of carry-on and checked baggage rules for different electric shaver types based on TSA and FAA lithium battery regulations. Electric Shaver vs. Other Razor Types: Which Is Most Travel-Friendly? Among all razor types, the electric shaver offers the most permissive and consistent treatment across all airports and aviation authorities worldwide. Here is how it compares: Razor Type Carry-On (TSA) Checked Bag (TSA) Security Risk Rating Travel Convenience Electric shaver Allowed Allowed* None Excellent Disposable cartridge razor Allowed Allowed Low Good Safety razor (removable blade) Body only Allowed Medium (blades) Moderate Straight razor Prohibited Allowed High Poor Razor blades (loose) Prohibited Allowed (wrapped) High Poor Table 2: Comparison of razor types by TSA carry-on and checked bag allowance, security classification, and overall travel convenience. *Corded and alkaline-battery shavers allowed in checked bags; lithium-battery shavers must travel in carry-on. International Travel: Do the Same Rules Apply Everywhere? The core rule — electric shavers permitted in carry-on, lithium battery devices restricted from checked baggage — is consistent across most major aviation authorities globally, because it derives from IATA dangerous goods regulations that most countries have adopted. However, travelers should be aware of a few important regional nuances: European Union (EASA) EU aviation security rules align closely with TSA guidelines on electric shavers. Electric razors are permitted in cabin baggage without restriction. The lithium battery rules mirror IATA guidelines — devices with lithium batteries above 100 Wh require airline approval, but standard shaver batteries are well below this threshold. EU Regulation (EC) No 300/2008 governs aviation security and applies uniformly across all EU member state airports. United Kingdom (CAA) Post-Brexit, the UK Civil Aviation Authority (CAA) maintains security rules consistent with pre-departure EASA standards and IATA guidelines. Electric shavers face no carry-on restrictions in the UK. Lithium battery rules are the same as EU and US: devices with built-in rechargeable batteries must travel in cabin baggage. Australia (CASA) The Civil Aviation Safety Authority (CASA) permits electric shavers in both carry-on and checked luggage. Lithium battery restrictions apply as per IATA Dangerous Goods Regulations. Note that Australia has implemented strict biosecurity screening on arrival — your shaver itself will not trigger any biosecurity concern, but other grooming items such as wooden brushes may be subject to inspection. China (CAAC) The Civil Aviation Administration of China permits electric shavers in carry-on baggage. China follows IATA lithium battery rules, with some additional restrictions on spare lithium batteries — travelers carrying spare shaver batteries should ensure each is individually protected against short circuit (e.g., in original packaging or a protective case) and carried in cabin baggage. Voltage Compatibility for Corded Shavers If you plan to use a corded electric shaver abroad, voltage compatibility is a separate concern from security regulations. Most modern corded shavers are dual-voltage (100–240V, 50/60Hz), indicated on the device label. If your shaver is single-voltage (e.g., 120V only), using it on a 220–240V outlet without a transformer will immediately destroy it. Always check the label before plugging in internationally. You will also need an appropriate plug adapter for the destination country's outlet type. Practical Packing Tips for Traveling with an Electric Shaver Beyond knowing the rules, smart packing habits protect your electric shaver from damage during travel and prevent any unnecessary delays at security. Use the travel lock or power-off mode: Most modern electric shavers have a travel lock that prevents accidental activation. Always engage it before packing. An activated shaver in a bag can drain the battery completely or, in rare cases, generate enough heat to cause concern in a cramped bag. Pack in the original case or a hard pouch: Foil shavers are particularly vulnerable to foil damage if the shaving head is compressed or struck. A hard-shell travel case — often included with mid-range and premium shavers — protects the foil or rotary head from deformation. Charge fully before departure: If your shaver needs to be in carry-on, charge it fully the night before travel. Airport charging opportunities are unpredictable, and a fully charged shaver provides peace of mind for multi-day trips. Place in an easily accessible pocket of your carry-on: Security screeners have the right to hand-inspect any electronic device. Placing your shaver in an accessible outer pocket means you can retrieve it quickly if asked, without unpacking your entire bag. Clean the shaver before travel: Loose hair clippings in your shaver can fall into your bag and create a mess. Clean the shaver head thoroughly before packing. This is also basic hygiene when traveling across international borders. Consider a travel-specific compact model: Several manufacturers offer compact travel shavers that are significantly lighter and smaller than full-size models — some weigh as little as 100–150 grams — without sacrificing shave quality for short trips. What Happens If TSA Stops You for Your Electric Shaver? It is extremely rare for TSA to stop a traveler specifically because of an electric shaver, but it can happen if the device's image on the X-ray screen is unclear or if there is an unrelated bag alert. Here is what to expect: If a TSA officer asks to inspect your carry-on and removes your electric shaver, this is a routine secondary screening procedure. The officer may power on the device to verify it is a functional consumer product. This is standard practice for electronic devices and takes approximately 30–60 seconds. Your shaver will be returned to you, and you will not be detained or penalized — electric shavers are permitted items. If your shaver triggers a chemical trace detection alarm (extremely unlikely but theoretically possible if it has been near certain industrial chemicals), a more thorough inspection will follow. In practice, this almost never occurs with consumer grooming devices. The most common reason a shaver-related bag check occurs is a dense, irregularly shaped object in the bag that partially obscures the shaver's image — for example, a thick power bank or metal toiletry case packed adjacent to the shaver. Keeping your shaver in a clearly identifiable pouch or case reduces the likelihood of triggering a manual check. Foil vs. Rotary Electric Shavers: Which Travels Better? Both foil and rotary electric shavers are equally permitted on planes, but foil shavers require slightly more careful packing because their thin metal foil is more vulnerable to impact damage during transit. Feature Foil Electric Shaver Rotary Electric Shaver Head Durability in Transit Moderate (foil is delicate) High (enclosed rotary heads) Typical Form Factor Slim / rectangular Rounded / ergonomic Ease of Cleaning While Traveling Easy (lift-and-rinse) Easy (rinse under tap) Battery Life (Typical) 45–60 minutes per charge 60–90 minutes per charge Travel Case Availability Common (included with many models) Common (included with many models) TSA/Security Treatment Identical — fully permitted Identical — fully permitted Table 3: Travel-relevant comparison between foil and rotary electric shavers across durability, battery life, cleaning ease, and security treatment. Frequently Asked Questions Q: Can you bring an electric shaver on a plane in your carry-on bag? Yes, absolutely. Electric shavers are explicitly permitted in carry-on baggage by the TSA and equivalent agencies worldwide. There is no quantity limit and no special declaration required. If your shaver has a built-in lithium battery (as most modern cordless shavers do), carry-on is actually the required location — not just permitted. Q: Can you put an electric shaver in checked luggage? It depends on the power source. Corded shavers and those powered by alkaline AA/AAA batteries can go in checked luggage. However, the vast majority of modern cordless electric shavers use built-in lithium-ion batteries — these must travel in carry-on baggage per FAA and IATA regulations. Placing a lithium-battery device in checked bags violates aviation safety regulations and may result in the item being confiscated. Q: Do I need to remove my electric shaver at airport security? No. Unlike laptops (which must be removed from bags at standard TSA checkpoints) or liquids (which must be placed in a clear bag), electric shavers do not need to be removed from your carry-on during standard TSA screening. They pass through the X-ray scanner inside your bag. Only if a TSA officer requests a manual check would you need to retrieve it. Q: Can I use my electric shaver on the plane? Technically, airlines do not explicitly prohibit operating a battery-powered electric shaver on board, but using one in the cabin is strongly discouraged as a matter of courtesy to fellow passengers — the noise is disruptive in an enclosed space. Most travelers use the lavatory if they need to shave mid-flight. Some aircraft lavatories have electric razor outlets (typically 110V AC or USB) specifically for this purpose. Q: What if my electric shaver is confiscated at security? A compliant electric shaver — one without prohibited modifications and with its battery in carry-on baggage as required — should never be confiscated by security. If a screener questions your shaver, calmly reference the TSA's official permitted items list. If you disagree with a screening decision, you can request a supervisor review at the checkpoint. Confiscated items can sometimes be mailed home by the airport's TSA office if you choose not to check your bag. Q: Are there any shavers that are specifically designed for air travel? Yes. Several manufacturers produce dedicated travel electric shavers that are compact (often under 150g), include a built-in travel lock, come with a hard case, and feature dual-voltage charging systems for international use. These models typically offer 30–45 minutes of cordless shaving time per charge — sufficient for 10–15 days of travel use with a single full charge — and are designed to fit comfortably in a toiletry bag without taking up significant space. The Bottom Line Bringing an electric shaver on a plane is one of the simplest and most straightforward packing decisions a traveler can make. The TSA permits it in carry-on bags without restriction, global aviation agencies follow the same standard, and the only rule worth remembering is the lithium battery rule: if your shaver has a built-in rechargeable battery (which most modern cordless shavers do), it must travel in your carry-on — not your checked bag. Pack your shaver in its travel case, engage the travel lock, charge it fully the night before, and you're ready for a clean, comfortable shave at your destination — no disposable razors, no liquid shaving cream restrictions, no complications at the security checkpoint.
VIEW FULL ARTICLE -
Apr 16,2026
Does Using a Facial Hair Remover Make Hair Grow Back Thicker?
The short answer is no: using a facial hair remover does not change the biological structure, thickness, or color of your hair. While many people perceive their hair to be coarser after removal, this is a common physiological illusion caused by the way hair is cut or extracted. Scientific evidence confirms that facial hair removal—whether through shaving, epilation, or trimming—only affects the dead portion of the hair above the skin surface or removes the follicle temporarily, without altering the DNA or growth patterns of the hair follicle itself. The Biological Reality of Hair Regrowth Hair thickness and growth rate are determined exclusively by genetics and hormonal factors rather than external removal methods. Every human hair grows from a follicle deep within the dermis layer of the skin. When you use a facial hair remover, you are either cutting the hair at the surface or pulling it out from the root. Neither of these actions communicates with the bulb of the follicle to produce a thicker strand. The follicle follows a predetermined cycle—anagen (growth), catagen (transition), and telogen (resting)—which is regulated by internal signals such as androgens and blood supply. The reason the myth persists is due to "the blunt end effect." Naturally, a hair strand tapers toward the end, making it feel soft and look thin. When a facial hair remover cuts the hair, it leaves a flat, blunt edge. As this blunt edge emerges from the skin, it feels prickly and appears darker because the cross-section is wider than the original tapered tip. However, once the hair grows out to its full length, it will be identical in texture to the hair that was there before. Comparing Different Facial Hair Removal Methods Different removal techniques yield different sensory experiences during regrowth, but none of them increase the actual diameter of the hair. Understanding how each tool interacts with the hair shaft is key to debunking the fears associated with facial grooming. Below, we examine the most common methods used for female facial hair removal and their impact on regrowth perception. Dermaplaning and Surface Shaving Surface shaving only removes the hair at the skin's surface, creating a temporary blunt tip that feels stiff as it grows back. This is the most common method that fuels the "thicker hair" myth. Because dermaplaning also exfoliates the top layer of dead skin cells, the new hair regrowth is juxtaposed against very smooth skin, making it more noticeable to the touch. In reality, the terminal hair or vellus hair (peach fuzz) remains biologically unchanged. Epilation and Waxing Methods that pull hair from the root, such as waxing or epilating, often lead to softer regrowth over time rather than thicker hair. When the hair is completely removed from the follicle, it must regrow a brand-new tip from the base. This new tip is naturally tapered, meaning it will feel much softer than shaved hair. Furthermore, repeated root removal can occasionally damage the hair follicle over years of use, potentially leading to sparser or finer hair growth in some individuals. Direct Comparison of Hair Removal Outcomes To provide a clearer perspective on how various tools affect the perception of hair thickness, the following table breaks down the technical aspects of each hair removal method. Method Depth of Removal Regrowth Texture Regrowth Appearance Shaving Skin Surface Prickly / Blunt Looks Darker (Temporary) Epilation From the Root Soft / Tapered Naturally Thin Cream Depilatory Slightly Below Surface Rounded / Soft Normal Laser/IPL Follicle Targeted Finer / Sparser Significantly Lighter Comparison of different hair removal techniques and their perceived impact on regrowth texture and appearance. Factors That Actually Affect Hair Thickness Hormonal changes and aging are the primary drivers of increased facial hair thickness, not the act of removing the hair. Many women begin noticing more prominent facial hair during periods of significant hormonal shifts, such as puberty, pregnancy, or menopause. During menopause, the drop in estrogen levels can lead to a higher relative ratio of androgens (male hormones), which can trigger terminal hair growth on the chin and upper lip. Additionally, medical conditions like Polycystic Ovary Syndrome (PCOS) are known to increase facial hair density and thickness. If you observe a sudden and dramatic change in your facial hair texture, it is more likely related to internal endocrine health than your choice of a facial hair remover. In these cases, the hair is biologically changing due to systemic factors, coinciding with—but not caused by—hair removal routines. Why Regrowth Might "Look" Darker New hair growth often appears darker because it has not yet been exposed to environmental light and pollutants. Over time, sunlight (UV radiation) and chemical exposure from skincare products naturally bleach hair slightly. When you use a facial hair remover and new hair emerges, you are seeing the hair in its most "pure" and pigmented state. This contrast against the surrounding skin makes the regrowth seem darker and more obvious than the older, weathered hair that was removed. Furthermore, as mentioned earlier, the blunt cross-section of a shaved hair reflects light differently than a tapered tip. A flat surface reflects more light in a concentrated way, making the hair shaft appear more substantial to the naked eye. This is purely an optical effect and does not indicate an increase in melanin or hair diameter. Best Practices for Using a Facial Hair Remover Maintaining a proper skincare routine before and after removal ensures the best aesthetic results and skin health. While the hair won't grow back thicker, improper technique can lead to ingrown hairs and skin irritation, which can make the area look uneven or bumpy. Exfoliate gently before using a facial hair remover to remove dead skin cells and prevent clogging. Always use a sharp, clean blade if you are shaving or dermaplaning to ensure a smooth cut without pulling. Apply a soothing moisturizer or aloe vera post-removal to reduce redness and maintain the skin barrier. Avoid heavy makeup for at least 12 hours after deep hair removal (like waxing) to let the pores breathe. Frequently Asked Questions (FAQ) Q1: Will dermaplaning turn my peach fuzz into thick beard hair? No. Peach fuzz, technically known as vellus hair, is biologically different from the terminal hair found on your scalp or underarms. Dermaplaning cannot transform vellus follicles into terminal follicles. Q2: How often should I use a facial hair remover? It depends on your personal preference and hair growth cycle. Most people find that every 2 to 4 weeks is sufficient for methods like epilation, while surface trimming may be done weekly. Q3: Can facial hair removal cause more hair to grow? Absolutely not. You have a fixed number of hair follicles on your face. Removing hair does not create new follicles or stimulate inactive ones to start producing hair. Q4: Why does my skin feel scratchy after removing facial hair? This is caused by the blunt edge of the hair. When hair is cut at an angle or horizontally, the remaining stubble is rigid. As it grows, it feels stiff and scratchy until it gains enough length to become flexible. Conclusion In summary, the belief that a facial hair remover causes thicker hair growth is a pervasive myth unsupported by science. Whether you choose to shave, wax, or use an electronic hair removal device, you are only managing the hair that your body is genetically and hormonally programmed to produce. By understanding the anatomy of hair and the optical illusions of regrowth, you can confidently choose the facial grooming routine that works best for your skin type and lifestyle without fear of unwanted side effects.
VIEW FULL ARTICLE
KEEP IN TOUCH
-

luke@aisenappliance.com
-

+86-13819843737 / +86-574-62361977
-

Unit 1, Building 7, No. 4 Xieli Road, Simen Town, Yuyao City, Zhejiang Province, China